Tools for Creating Screen or Online Presentations
Copyright © 2001 - 2014 Michael Wiedmann
| Revision History | |
|---|---|
| Revision 0.2.8 | 2014-11-09 |
| Added reveal.js; corrected URL for pdfslide | |
| Revision 0.1.0 | 2004-03-22 |
| Source format switched to DocBook XML (V4.3). Using DocBook XSL Stylesheets (V1.75.2), and DB2LaTeX XSL Stylesheets (V0.8pre1+20040315) for generating the various output formats. | |
| Revision 0.0.1 | 2001-03-10 |
| Initial release. | |
Table of Contents
- Preface
- 1 PDF Based Solutions
- 2 HTML Based Solutions
- 3 Other Solutions
- 4 Todo
-
- 1 Active-DVI
- 2 Combined Slidemaker
- 3 ConTeXt
- 4 deck.js
- 5 elpres
- 6 Fathom.js
- 7 gpresent
- 8 HavenPoint
- 9 HTML Slidy
- 10 ImPress
- 11 impress.js
- 12 Impress!ve
- 13 Java Power Presenter - JPP
- 14 JackSVG
- 15 Lecturer
- 16 LyX
- 17 marSLIDE
- 18 mozPoint
- 19 Orator
- 20 pandoc
- 21 pdfslide
- 22 pdfwin
- 23 Pointless
- 24 powerdot
- 25 PPPSlides
- 26 Present
- 27 Prestimel
- 28 pylize
- 29 Pyslide
- 30 reveal.js
- 31 S5
- 32 S5 Reloaded
- 33 screen.sty
- 34 Slide40
- 35 Slidemaker
- 36 SlideML
- 37 slides
- 38 slides.sh
- 39 Slideshow
- 40 Spork
- 41 talk
- 42 TeX4ht: LaTeX and TeX for Hypertext
- 43 TPP Text Presentation Program
- 44 Utopia PDF Presentations Bundle
- 45 wiki2beamer
- 46 WML - Website META Language
- 47 xdvipresent
- 48 XSLies
- 49 xsw
- 50 XUL Slideshow Toolkit
- 5 Hints and Tricks
- A History, Credits, Remarks, and License
- Index
List of Figures
- 1.1 AxPoint example
- 1.2 beamer example: title page in Acrobat Reader
- 1.3 foiltex example: title page in Acrobat Reader
- 1.4 HA-prosper example: titlepage slide
- 1.5 HA-prosper example: introduction slide
- 1.6 HA-prosper example: welcome slide
- 1.7 ifmslide example: title page in Acrobat Reader
- 1.8 IPE example
- 1.9 pdfscreen example: title page in Acrobat Reader
- 1.10 prosper example: page in Acrobat Reader
- 1.11 rayslides example: title page
- 1.12 rayslides example: second page
- 1.13 PythonPoint example: page in Acrobat Reader
- 1.14 slidenotes example: sample page
- 1.15 slidenotes example: sample page with notes
- 1.16 slideshow example
- 1.17 TexPower example: title page in Acrobat Reader
- 1.18 TexPower example: partial displayed page 2
- 1.19 web.sty example: title page in Acrobat Reader
- 1.20 web.sty example: page in Acrobat Reader
- 2.1 slides example: title page in Netscape
- 2.2 slides example: first page in Netscape
- 3.1 mgp example in Acrobat Reader
- 4.1 powerdot example
- 4.2 Slide40 example output
List of Examples
- 1.1 AxPoint Example
- 1.2 beamer example
- 1.3 foiltex Example
- 1.4 HA-prosper Example
- 1.5 ifmslide Example
- 1.6 IPE xml file
- 1.7 pdfscreen Example
- 1.8 PPower4 Example
- 1.9 prosper Example
- 1.10 RaySlides Example
- 1.11 PythonPoint Example
- 1.12 slidenotes Example
- 1.13 slideshow Example
- 1.14 TexPower Example
- 1.15 web.sty Example
- 2.1 DocBook dbslide Example
- 2.2 DocBook slides Example
- 3.1 DFBPoint Example
- 3.2 mechapoint Example
- 3.3 mgp Example
- 4.1 elpres Example
- 4.2 powerdot Example
- 4.3 TPP Example
Preparing a presentation usually means creating some sort of slides. The more LCD projectors get common in working environments, the more comes to mind creating such presentation material as a screen version, which can be viewed using a LCD projector or at least a computer screen. As a side effect such presentations can usually easily be presented on a website.
This document tries to show some possible solutions for creating screen based presentations. Most of the listed solutions are LaTeX-based because I personally prefer LaTeX - and derived tools - over other documentation systems. So called Office Solutions are not listed.
This list for sure is far from being complete. If you know of any other solution please let me know so that I can include it in this document. Contributions are very welcome.
The presented solutions are divided in three groups: PDF Based Solutions, HTML Based Solutions, and Other Solutions. In case a specific solution would fit in more than one group, I tried to choose the most appropriate one. An additional chapter Todo lists all the tools which I haven't had time yet to look at. The chapter Hints and Tricks will list interesting hints and tricks for creating presentations.
If you like this work or find it useful somehow consider donating using http://flattr.com
Table of Contents
This chapter lists tools which generate PDF as their main output format. Some of them might be able to generate other output formats too (like PS).
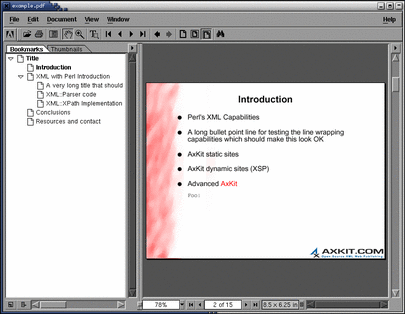
“AxPoint is a presentation making tool from the makers of Apache AxKit. It allows you to build beautiful presentations using a simple XML description format. ”
Example 1.1. AxPoint Example
<?xml version="1.0"?>
<slideshow>
<title>AxKit</title>
<metadata>
<speaker>Matt Sergeant</speaker>
<email>matt@axkit.com</email>
<organisation>AxKit.com Ltd</organisation>
<link>http://axkit.com/</link>
<logo scale="0.4">ax_logo.png</logo>
<background>redbg.png</background>
</metadata>
<slide transition="dissolve">
<title href="http://www.xml.com/">Introduction</title>
<point level="1" href="http://xmlperl.com">Perl's XML Capabilities</point>
<point level="1">A long bullet point line for testing the line
wrapping capabilities which should make this look OK</point>
<point level="1">AxKit static sites</point>
<point level="1">AxKit dynamic sites (XSP)</point>
<point level="1">Advanced <colour name="red">AxKit</colour></point>
<source_code>
<color name="blue">Foo!</color>
</source_code>
</slide>
<slide default-transition="replace">
<title>Table Example</title>
<table>
<row>
<col width="40%">
<source-code>
Some code;
in the
++ first; # column
that {
maybe we
want to comment();
on...
}
</source-code>
<point>and a point here...</point>
<source-code>followed by more code</source-code>
<point>and another point</point>
</col>
<col width="60%">
<point>Notice how we did this...</point>
<point>And how we can add stuff over here!</point>
<source-code>include <ing.h> //code</source-code>
</col>
</row>
</table>
<!-- Now some SVG! -->
<rect x="100" y="100" width="50" height="100" style="stroke: black"/>
<circle cx="50" cy="50" r="240"/>
<ellipse cx="100" cy="50" rx="30" ry="60" style="fill: aqua;
stroke: red; stroke-width: 5"/>
<text x="200" y="200" style="stroke: black; fill: none;
font: italic 24pt serif">A Cat</text>
</slide>
<slideset>
<title>XML with Perl Introduction</title>
<slide>
<title>A very long <i>title that</i> should show how word
<i>wrapping in the title</i> tag hopefully works
properly today</title>
<point level="1">SAX-like API</point>
<point level="1">register callback handler methods</point>
<point level="2">start tag</point>
<point level="2">end tag</point>
<point level="2">characters</point>
<point level="2">comments</point>
<point level="2">processing instructions</point>
<source_code>
<?pi here?>
</source_code>
<point level="2">... and more</point>
<point level="1">Non validating XML parser</point>
<point level="1">dies (throws an exception) on bad XML</point>
</slide>
<slide>
<title>XML::Parser code</title>
<source_code>
my $p = XML::Parser->new(
<i> Handlers => {
Start => \&start_tag,
End => \&end_tag,
# add more handlers here
});
</i>
$p->parsefile("foo.xml");
<color name="green">exit(0);</color>
sub start_tag {
my ($expat, $tag, %attribs) = @_;
print "Start tag: $tag\n";
}
sub end_tag {
my ($expat, $tag) = @_;
print "End tag: $tag\n";
}
</source_code>
</slide>
<slide>
<title>XML::XPath Implementation</title>
<point level="1">XML::Parser and SAX parsers build an
in-memory tree</point>
<point level="1">Hand-built parser for XPath syntax
(rather than YACC based parser)</point>
<point level="1">Garbage Collection yet still has
circular references (and works on Perl 5.005)</point>
<image>pointers.png</image>
</slide>
</slideset>
<slide>
<title>Conclusions</title>
<point level="1" transition="dissolve">Perl and XML are a
powerful combination</point>
<point level="1" transition="replace">XPath and XSLT add
to the mix...</point>
<point level="1" transition="glitter">AxKit can reduce your
long term costs</point>
<point level="2" transition="dissolve">In site re-design</point>
<point level="2" transition="box">and in content re-purposing</point>
<point level="1" transition="wipe">Open Source equal to
commercial alternatives</point>
<image transition="dissolve">world_map-960.png</image>
</slide>
<slide>
<title>Resources and contact</title>
<point level="1">AxKit: http://axkit.org/</point>
<point level="1">CPAN: http://search.cpan.org</point>
<point level="1">libxml and libxslt: http://www.xmlsoft.org</point>
<point level="1">Sablotron: http://www.gingerall.com</point>
<point level="1">XPath and XSLT Tutorials: http://zvon.org</point>
</slide>
</slideshow>
See Figure 1.1,
“AxPoint example”.
http://axpoint.axkit.org/ (last time checked: 2009-04-23)
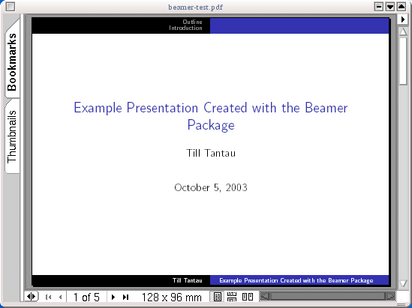
“beamer -- A LaTeX class to produce beamer presentations ”
Example 1.2. beamer example
\documentclass{beamer}

\usepackage{beamerthemesplit}

\title{Example Presentation Created with the Beamer Package}
\author{Till Tantau}
\date{\today}

\begin{document}

\frame{\titlepage}

\section[Outline]{}
\frame{\tableofcontents}

\section{Introduction}
\subsection{Overview of the Beamer Class}
\frame
{
  \frametitle{Features of the Beamer Class}

  \begin{itemize}
  \item<1-> Normal LaTeX class.
  \item<2-> Easy overlays.
  \item<3-> No external programs needed.
  \end{itemize}
}
\end{document}
See
Figure 1.2, “beamer example: title page in Acrobat
Reader”.
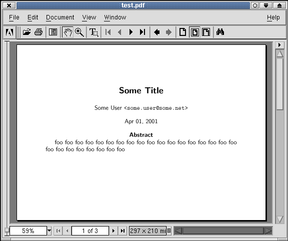
foiltex is a LaTeX document class which lets you create foils using most of the available LaTeX commands and environments.
Different options let you specify head and/or foot rules, title
pages, etc. The macro \MyLogo
together with the graphics
or graphicx package let's
you put some graphic as the logo on every page (placed at the left
part of the footline).
Processing a foiltex sourcefile using LaTeX creates DVI output in the usual way, using pdfTeX (pdfLaTeX) allows you to create high quality PDF output. With latex2html and the FoilHTML package (look for it at your nearest CTAN mirror) you can create HTML output from your foiltex source files.
Example 1.3. foiltex Example
\documentclass[a4paper,landscape,headrule]{foils}
\usepackage[latin1]{inputenc}
\usepackage{graphicx}

\title{Some Title}

\author{Some User \texttt{<some.user@some.net>}}

\date{Apr 01, 2001}

\MyLogo{}
\rightfooter{}

\leftheader{Project Presentation}
\rightheader{Project Title\quad\textsf{\tiny[\thepage]}}

\begin{document}

\maketitle

\begin{abstract}
foo foo foo foo foo foo foo foo foo foo foo foo foo
foo foo foo foo foo foo foo foo foo foo foo foo foo
\end{abstract}

\foilhead{Introduction}

\begin{itemize}
\item Topic 1
\item Topic 2
\item ...
\end{itemize}

\foilhead{Overview}

\begin{center}
\includegraphics{overview.eps}
\end{center}

\end{document}
See
Figure 1.3, “foiltex example: title page in Acrobat
Reader”.
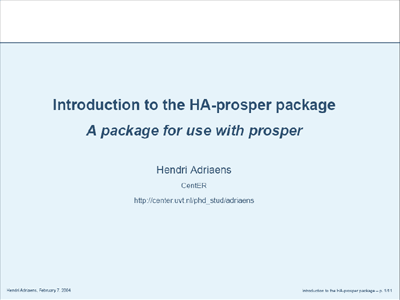
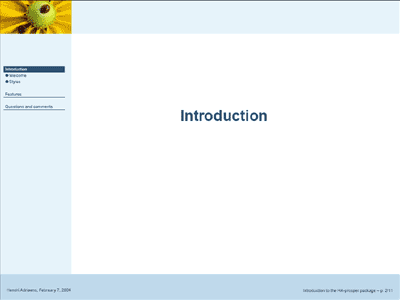
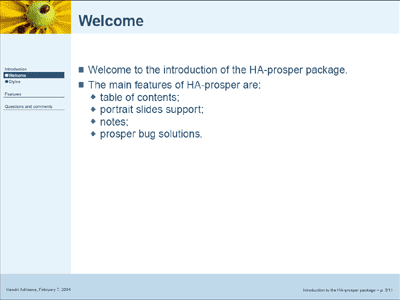
“HA-prosper is based on the prosper class but adds a lot new possibilities and implements some bug fixes for prosper. The main features of HA-prosper are the automatically generated table of contents, portrait slides support and the possibility to include notes in your presentation. But there are a lot more features which are described in full detail in the manual. ”
Example 1.4. HA-prosper Example
\documentclass[pdf,distiller]{prosper}
\usepackage[toc,highlight,HA]{HA-prosper}

\title{Introduction to the HA-prosper package}
\subtitle{A package for use with prosper}
\author{Hendri Adriaens\\
\institution{CentER}\\
\institution{\href{http://center.uvt.nl/phd_stud/adriaens}
                {http://center.uvt.nl/phd\string_stud/adriaens}}}

\DefaultTransition{Wipe}
\TitleSlideNav{FullScreen}
\NormalSlideNav{ShowBookmarks}
\LeftFoot{\href{http://center.uvt.nl/phd_stud/adriaens}{Hendri Adriaens}, \today}
\RightFoot{Introduction to the HA-prosper package}

\begin{document}

\maketitle

\tsectionandpart{Introduction}

\overlays{2}{
\begin{slide}{Welcome}
  \begin{itemstep}
  \item Welcome to the introduction of the HA-prosper package.
  \item The main features of HA-prosper are:
    \begin{itemize}
    \item table of contents;
    \item portrait slides support;
    \item notes;
    \item prosper bug solutions.
    \end{itemize}
  \end{itemstep}
\end{slide}
}

\end{document}
See Figure 1.4,
“HA-prosper example: titlepage slide”, Figure 1.5,
“HA-prosper example: introduction slide”, and
Figure 1.6,
“HA-prosper example: welcome slide”.
http://stuwww.uvt.nl/~hendri/downloads/haprosper.html
HA-prosper is available on CTAN (http://www.ctan.org/tex-archive/help/Catalogue/entries/ha-prosper.html) and in MiKTeX (http://www.miktex.org).
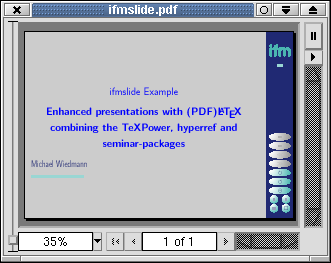
“ifmslide provides both: getting a presentation
with pdfLaTeX and printouts with LaTeX and - as a side effect -
simple production of your slides using your favourite DVI-viewer.
You don't need PPower4 to get all
these nice effects with page-transitions and stepwise building of
the pages. All you need is TeXPower
and hyperref.sty for the links and
buttons etc. ifmslide makes use of
the special features of the classes seminar and powersem (part of TeXPower). ”
Example 1.5. ifmslide Example
\documentclass[a4paper,KOMA,landscape]{powersem}
\usepackage[button]{ifmslide}

\begin{document}
\sffamily

\orgname{}

\title{\begin{minipage}[t]{0.98\textwidth}\begin{center}
      {\mdseries ifmslide Example}\\[1ex]
      Enhanced presentations with (PDF)\LaTeX{}\\
      combining the TeXPower, hyperref and seminar-packages\\
    \end{center}\end{minipage}}

\author{\scalebox{1}[1.3]{Michael Wiedmann}}

\address{\href{mailto:mw@miwie.in-berlin.de}%
  {mw@miwie.in-berlin.de}}

\begin{slide}
  \maketitle
\end{slide}

\end{document}
See
Figure 1.7, “ifmslide example: title page in Acrobat
Reader”.
http://www.solmech.tu-darmstadt.de/user/emmel/ (last time checked: 2009-04-26)
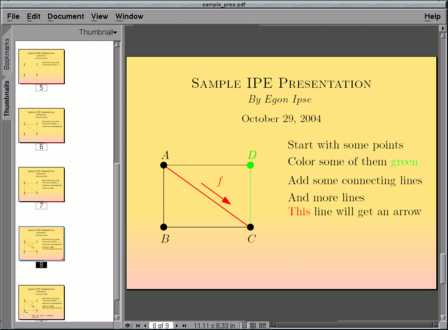
Note
The content of this section is heavily based on the contribution of Jan Hlavacek.
IPE is a vector graphics editor integrated with pdflatex, with strong support for creating multi-page incerementally built pdf presentations. It uses pdflatex to typeset text elements and math formulas on the page. It is especially useful if your presentation has a lot of graphics or if you desire a complete control over the location of your text elements on the page.
Example 1.6. IPE xml file
<ipe version="60020" creator="Ipe 6.0 preview 20" media="0 0 800 600">
<info created="D:20041029041427" modified="D:20041029042906" title="Sample IPE Presentation" author="Egon Ipse" subject="IPE presentation" keywords="IPE, pdflatex, screen presentation" pagemode="fullscreen"/>
<ipestyle name="presentation">
<linewidth name="normal" value="1.2"/>
<linewidth name="heavier" value="2.4"/>
<linewidth name="fat" value="3.6"/>
<linewidth name="ultrafat" value="6"/>
...
<text stroke="black" pos="232 264" type="label" width="17.85" height="20.778" depth="5.79" valign="bottom" transformable="yes" size="normal">$f$</text>
<text stroke="black" pos="416 212" type="minipage" width="352" height="20.778" depth="5.79" valign="top" transformable="yes" size="normal">This line will get an arrow</text>
<mark layer="delta" stroke="black" pos="96 320" shape="2" size="large"/>
</page>
</ipe>
Ipe (last time checked: 2009-04-24)
“pdfscreen package helps to redesign the pdf output of your normal documents fit to be read in a computer monitor while retaining the freedom to format it for conventional printing. This has been brought about by redefining the margins and page height/width and related dimensions to fit into that of the computer screen. By changing the options to print you can switch the package to format the document in the conventional way as your class file dictates. ”
Users familiar with LaTeX will not have any difficulties in using this package.
Example 1.7. pdfscreen Example
\documentclass[a4paper,11pt]{article}
\usepackage{xspace,colortbl}

\usepackage[screen,panelleft,gray,paneltoc]{pdfscreen}
\margins{.75in}{.75in}{.75in}{.75in}
\screensize{6.25in}{8in}

\begin{document}

\begin{screen}
\title{\color{section0}\Huge Some Title}
\end{screen}

\begin{print}
\title{\HugeSome Title}
\end{print}

\author{\color{section1}\Large Michael Wiedmann\\
        {\small\href{mailto:mw@miwie.in-berlin.de}
        {\color{section1}\texttt{mw@miwie.in-berlin.de}}}}
\maketitle
\begin{screen}
\vfill
\end{screen}

\begin{abstract}
\noindent
foo foo foo foo foo foo foo foo foo foo foo foo foo foo foo foo foo
foo foo foo foo foo foo foo foo foo foo foo foo foo foo foo foo foo
foo foo foo foo foo foo foo foo foo foo foo foo foo foo foo foo foo
\end{abstract}

\begin{print}
\tableofcontents
\end{print}
\begin{screen}
\vfill
\end{screen}

\begin{slide}

\begin{itemize}
\item item 1
\item item 2
\item item 3
\end{itemize}

\end{slide}


\begin{slide}

\begin{itemize}
\item  item 1
\item  item 2
\item  item 3
\end{itemize}

\end{slide}

\end{document}
See
Figure 1.9, “pdfscreen example: title page in Acrobat
Reader”.

http://pdfscreen.sarovar.org/ (last time checked: 2009-04-24)
Copyright (c) 1999, 2000 C. V. Radhakrishnan
“ This package may be distributed under the terms of the LaTeX Project Public License, as described in lppl.txt in the base LaTeX distribution. Either version 1.0 or, at your option, any later version. ”
There is also a version which can be used with LyX. See http://www.math.tau.ac.il/~dekelts/lyx/pdfscreen.tar.gz
(based on an outdated version of pdfscreen.sty).
PPower4 is a post processor for LaTeX files to build pages step by step.
PPower4 provides a small
LaTeX package (pause.sty) which let's
the user insert small coloured spots (using the command
\pause) in the PDF file where a break
should be make during display. During postprocessing PPower4 removes these coloured chunks
and adjusts the page number. This leads to the impression that the
same page is displayed step by step.
Additional packages are provided for setting background colours
(background.sty) and page transitions
(pagetrans.tex) - this actually is a
feature of hyperref.sty and can be
used with any LaTeX based solution.
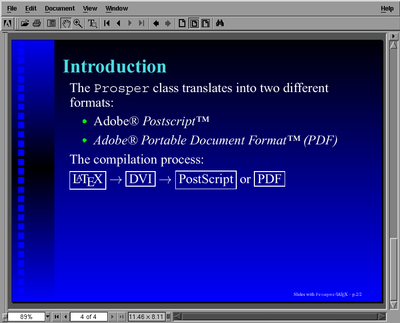
“Prosper is a LaTeX class for writing transparencies. It is written on top of the seminar class by Timothy Van Zandt. It aims at offering an environment for easily creating slides for both presentations with an overhead projector and a video projector. Slides prepared for a presentation with a computer and a video projector may integrate animation effects, incremental display, and such. ”
Example 1.9. prosper Example
\documentclass[slideColor,colorBG,pdf,azure]{prosper}

\usepackage{textcomp}

\title{The \texttt{Prosper} Class}
\subtitle{Producing Slides with \LaTeX}
\author{John Doe}
\email{jd@eval.com}
\institution{The Evaluation Company}
\slideCaption{Slides with \texttt{Prosper}/\LaTeX}

\begin{document}

\maketitle

\overlays{3}{
  \begin{slide}{Introduction}

    The \texttt{Prosper} class translates into two different formats:
    \begin{itemize}
    \item Adobe\textregistered\ \it{Postscript}\texttrademark
    \item Adobe\textregistered\ \it{Portable Document Format}
          \texttrademark\ (PDF)
    \end{itemize}

    The compilation process:\\
    \fromSlide*{1}{\fbox{\LaTeX}}%
    \fromSlide*{2}{$\rightarrow$ \fbox{DVI}}%
    \fromSlide*{3}{$\rightarrow$ \fbox{PostScript} or \fbox{PDF}}%
  \end{slide}
}

\end{document}
See Figure 1.10,
“prosper example: page in Acrobat Reader”.
-
graphicx.sty,seminar.sty,hyperref.sty -
Slide styles need PSTricks and AMSLaTeX (amssymb)
-
Recent version of Ghostscript (version >= 6.0) to produce PDF
-
HA-Prosper The HA-prosper package for LaTeX provides a way to make nice looking slides using LaTeX. This gives you the opportunity to copy and paste formulas from your papers directly into the presentation. The package has been based on the prosper class but offers a lot of new possibilities and some bug fixes.
-
Prosper-make allows you to easily generate your Prosper presentation in the most common formats.
-
ppr-prvstands for "Prosper Preview". The aim of this class is to produce a printable version of the slides written with Prosper, with two slides per page. -
DTU-style for prosper compatible with the DTU (Department of Mechanical Engineering, Technical university of Denmark) Powerpoint style.
-
Wiki Prosper is a WikiWikiWeb dedicated to the use of the LaTeX Prosper style.
http://sourceforge.net/projects/prosper/ (last time checked: 2009-04-24)
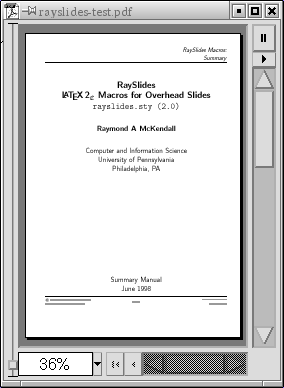
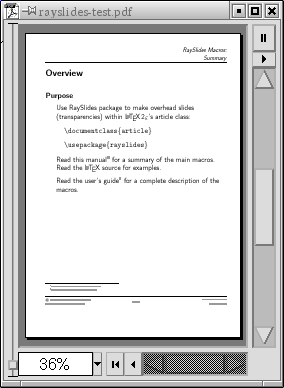
“RaySlides macros provide LaTeX2e commands for making overhead slides (transparencies) within the article style. The underlying philosophy for these commands recognizes both the resources of the article style for slide preparation as well as the practical inconvenience of accesing these resources for overhead slides. Consequently, RaySlides simply supplements the article style with macros specialized for designing and formatting slides. This approach retains the commands and familiarity of the article style while providing an interface for slides. ”
Example 1.10. RaySlides Example
\documentclass{article}
\usepackage{rayslides}

\ezmakehead{0.6in}
   {}
   {}
   {\LARGE\emph{\rayslides\ Macros: \\ Summary}}

\ezmakefoot{1cm}
   {\smallskip
    \textrm{\copyright}\ R.A. McKendall 1994,1998\\ University of Pennsylvania}
   {\textbf{\thepage}/\pageref{lastpage}}
   {\jobname.tex\\ rayslides.sty}

\writelpfile
\slideframe

\newcommand  {\cs}  [1] {\textmd{\texttt{\string#1}}}
\renewcommand{\arg} [1] {\textmd{\texttt{\{#1\}}}} % required  argument

\begin {document}

%--- Slide 1 ---

\titlepageslide
   {\rayslides \\ \LaTeXe{} Macros for Overhead Slides \\
    \texttt{rayslides.sty (2.0)}}
   {Raymond A McKendall}
   {Computer and Information Science \\ University of Pennsylvania \\
    Philadelphia, PA}
   {Summary Manual \\ June 1998}

%--- Slide 2 ---

\newslide{Overview}

\begin{point}{Purpose}
   Use \rayslides\ package to make overhead slides
   (transparencies) within \LaTeXe's article class:
   \subdetail{\cs{\documentclass}\arg{article}}
   \subdetail{\cs{\usepackage}\arg{rayslides}}

   Read this manual\footnote{%
   \texttt{/pkg/doc/tex/RaySlidesSummary.tex}}
   for a summary of the main macros.
   Read the \LaTeX\ source for examples.

   Read the user's guide\footnote{%
   \texttt{/pkg/doc/tex/RaySlidesGuide.ps}}
   for a complete description of the macros.
\end{point}

%--- Slide 3 ---

\newslide{Page Layout}

\begin{point}{Horizontal layout}
    Left margin. Body. Right margin.
\end{point}

\begin{pointNlist}{Vertical layout}
   \item Top margin -- empty space along top of page
   \item Head -- runner along top of page
   \item Top separation -- space between head and body
   \item Body -- main contents of slide
   \item Bottom separation -- space between body and foot
   \item Foot -- runner along bottom of  page
   \item Bottom margin -- empty space along bottom of page
\end{pointNlist}

\end{document}
See Figure 1.11,
“rayslides example: title page” and Figure 1.12,
“rayslides example: second page”.
http://homel.vsb.cz/~rad79/?C=N;O=D (last time checked: 2009-04-26)
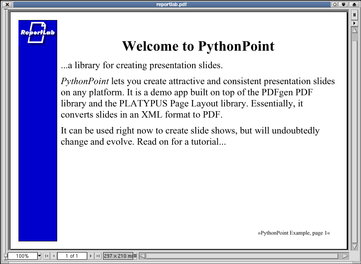
PythonPoint is a demo application of the ReportLab toolkit, a Python library for creating PDF documents. It uses an XML source format which gets converted directly to PDF output.
An experimental DTD (Document Type Definition) is available from the author of this document. It can be used to validate your source file using an XML parser.
Example 1.11. PythonPoint Example
\documentclass[a4paper,landscape,headrule]{foils}
<?xml version="1.0" encoding="iso-8859-1" standalone="no" ?>
<!DOCTYPE presentation SYSTEM "pythonpoint.dtd">
<presentation filename='reportlab.pdf'>
<title>PythonPoint Example</title>
<author>Michael Wiedmann</author>
<subject>Reportlab Pythonpoint Example</subject>
<section name = 'Main'>
<rectangle x="20" y="20" width="96" height="555" fill="(0,0,0.8)"/>
<fixedimage x="20" y="510" width="96" height="64"
filename="leftlogo.gif"/>
<infostring align="right" x="800" y= "36" size="14" >
»%(title)s, page %(page)s«
</infostring>
<slide id="Slide001" title="Introduction" effectname='Wipe'>
<frame x="120" y="72" width="700" height="468"
leftmargin="36" rightmargin="36">
<para style='Heading1'>Welcome to PythonPoint</para>
<para style='BodyText'>...a library for creating presentation
slides.
</para>
<para style='BodyText'>
<i>PythonPoint</i> lets you create attractive and consistent
presentation slides on any platform. It is a demo app built
on top of the PDFgen PDF library and the PLATYPUS Page Layout
library. Essentially, it converts slides in an XML format to PDF.
</para>
<para style='BodyText'>It can be used right now to create
slide shows, but will undoubtedly change and evolve. Read on
for a tutorial...
</para>
</frame>
</slide>
</section>
</presentation>
See
Figure 1.13, “PythonPoint example: page in Acrobat
Reader”.
ReportLab (last time checked: 2009-04-24)
The experimental DTD can be found at: http://www.miwie.org/pythonpoint/
PDF Seminar is a simple style file designed for seminar presentations. It provides pop-up menus for page selections and for basic navigation (such as next page, previous page etc.). All of the menus are built on PDF forms and thus the package is suitable for use only with PDF viewers than can handle PDF forms (such as Adobe Acrobat Reader).
COPYRIGHT 1993, by Timothy Van Zandt, tvz@Princeton.EDU
Copying of part or all of any file in the seminar.sty
package is allowed under the following conditions only:
(1) You may freely distribute unchanged copies of the
    files. Please include the documentation when you do so.
(2) You may modify a renamed copy of any file, but only
    for personal use or use within an organization.
(3) You may copy fragments from the files, for personal
    use or for use in a macro package for distribution,
    as long as credit is given where credit is due.
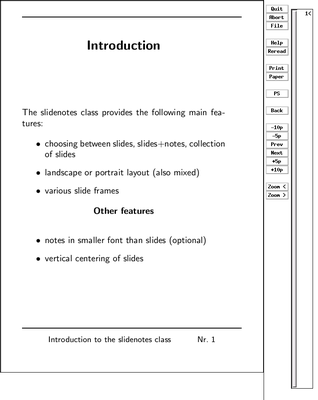
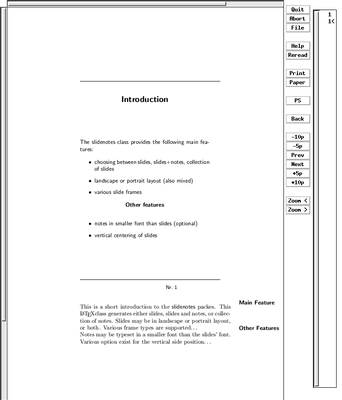
“This is a short introduction to the slidenotes packes. This LaTeX class generates either slides, slides and notes, or collection of notes. Slides may be in landscape or portrait layout, or both. Various frame types are supported... ”
Example 1.12. slidenotes Example
\documentclass[notes,portrait,rules]{slidenotes}

\title{Introduction to the \textsf{slidenotes} class}
\author{John Doe}
\date{26.7.2001}

\begin{document}

\maketitle

\begin{slide}[Introduction]

  The \textsf{slidenotes} class provides the following main features:

  \begin{itemize}
  \item choosing between slides, slides+notes, collection of slides
  \item landscape or portrait layout (also mixed)
  \item various slide frames
  \end{itemize}

  \slidesubtitle{Other features}

  \begin{itemize}
  \item notes in smaller font than slides (optional)
  \item vertical centering of slides
  \end{itemize}

\end{slide}

\begin{note}

  \cue{Main Feature}

  This is a short introduction to the \textsf{slidenotes} packes.
  This \LaTeX class generates either slides, slides and notes,
  or collection of notes. Slides may be in landscape or portrait
  layout, or both.  Various frame types are supported\ldots

  \cue{Other Features}

  Notes may be typeset in a smaller font than the slides' font.
  Various option exist for the vertical side position\ldots

\end{note}

\end{document}
See Figure 1.14, “slidenotes example: sample page” and Figure 1.15, “slidenotes example: sample page with notes”.
http://staff.science.uva.nl/~hansm/publications.html (last time checked: 2009-04-24)
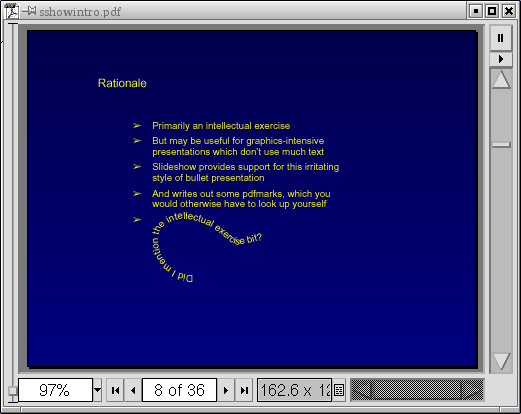
“slideshow is a small macro package which simplifies the process of creating slide-show style presentations using plain metapost and ghostscript. The package assists in producing slides with dimensions 6.4 inches wide by 4.8 inches high, which the user is then expected to convert into a pdf file using ghostscript as a PS distiller. ”
Example 1.13. slideshow Example
input pathalong;
input slideshow;

author("Patrick TJ McPhee");
title("Introducing slide-show macros");
keywords("presentations metapost");
copyright("Copyright 2001 Patrick TJ McPhee. You may redistribute and
  modify for any purpose, but must acknowledge significant quotation.");

continue;

nextfig;
  defaultscale := 2;
  draw textunder((0,.5in){up}..{right}(2in,1in), "Introducing")
    shifted (1in,3in) withcolor textcolour;
endfig;

nextfig;
  blabel.rt("Slide Show Macros", (2in,2in));
endfig;

defaultscale := 1;

nextfig;
  draw pathalong((0,.5in){up}..{right}(2in,1in), "by Patrick TJ McPhee")
    shifted (1in,3in) withcolor textcolour;
  hyperdest("Start");
endfig;

discontinue;

header("Rationale");

bpoint("Primarily an intellectual exercise");
bpoint("But may be useful for graphics-intensive presentations
       which don't use much text");
bpoint("Slideshow provides support for this irritating style
       of bullet presentation");
bpoint("And writes out some pdfmarks, which you would otherwise
       have to look up yourself");

...

picture lt, mp, dvi, gs, postp, vres, pres, fpres;

lt := procbox("laTeX") shifted (.05 lawidth, .2laheight);
mp := procbox("metapost") shifted (.05 lawidth, .1laheight);
dvi := procbox("DVI processor") shifted (.2 lawidth, .15laheight);
vres := resultbox("viewable result") shifted (.4 lawidth, .15 laheight);
gs := procbox("distiller") shifted (.65 lawidth, .15laheight);
pres := resultbox("presentation") shifted (.8 lawidth, .15laheight);
postp := procbox("post-processor") shifted (.7 lawidth, .3laheight);
fpres := resultbox("final presentation") shifted (.45 lawidth, .3laheight);

nextfig;
  bullet.in("text prepared with laTeX");
  draw lt withcolor white;
endfig;

nextfig;
  bullet.in("graphics prepared with metapost (okay, 2 components)");
  draw mp withcolor red;
endfig;

nextfig;
  bullet.in("which are combined with dvi processing software");
  pickup thin nib;
  drawarrow (.5[lrcorner mp,urcorner mp]){right}..{right}
    (.5[llcorner dvi,ulcorner dvi]) withcolor .25[red,white];
  drawarrow (.5[lrcorner lt,urcorner lt]){right}..{right}
    (.5[llcorner dvi,ulcorner dvi]) withcolor .25[white,red];

  draw dvi withcolor .5[white,red];
endfig;

nextfig;
  bullet.in("the resulting postscript is viewable, but must
    be distilled into the presentation");
  pickup thin nib;
  drawarrow (.5[lrcorner dvi,urcorner dvi])..(.5[llcorner vres,ulcorner vres])
            withcolor .1[.5[red,white],green];
  draw vres withcolor .5[.5[white,red],green];
endfig;

...

nextfig;
  pickup thin nib;
  drawarrow (.5[llcorner postp,ulcorner postp])..(.5[lrcorner fpres,urcorner fpres])
            withcolor .95[green,white];
  draw fpres withcolor white;
endfig;

discontinue;
...
discontinue;
header("Limitations");

bpoint("Metapost doesn't handle text very well");
bpoint("It's difficult to include non-metapost graphics (e.g., bit-maps)");
bpoint("There's no provision for producing print-only versions of the information");
bpoint("There's no concept of presentation styles");
bpoint("It generally requires some configuration of ghostscript and metapost, especially if you use math");
bpoint("The other methods for producing presentations using TeX-family tools aren't as complicated as I suggested");
bpoint.in("I personally use my own plain-TeX style with just TeX, metapost, and dvipdfm");

...
nextfig;
  hyperlabel(breaktowidth("Thanks for sticking to the end. Click on this text to start over.", .5lawidth)(ignore), (.5lawidth, .5laheight), "Start");
endfig;

end
See Figure 1.16,
“slideshow example”.
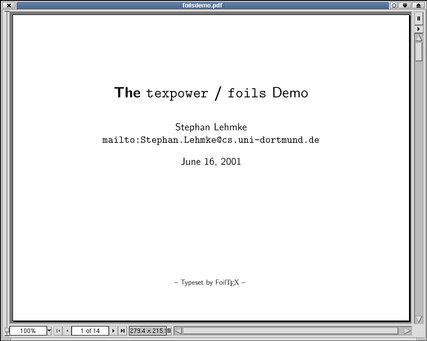
“The TeXPower
bundle contains style and class files for creating dynamic online
presentations with LaTeX. The heart of the bundle is the package
texpower.sty which implements some
commands for presentation effects. This includes page transitions,
color highlighting and displaying pages incrementally.
”
Example 1.14. TexPower Example
\documentclass[landscape]{foils}
\usepackage{fixseminar}
\usepackage[display]{texpower}
\begin{document}
\title{The \code{texpower} / {\normalfont \texttt{foils} Demo}}
\author{Stephan Lehmke\\\code{mailto:Stephan.Lehmke@cs.uni-dortmund.de}}
\maketitle
\foilhead{A list environment}
\pause
\stepwise
{
\begin{description}
\item[foo.] \step{bar.}
\step{\item[baz.]} \step{qux.}
\end{description}
}
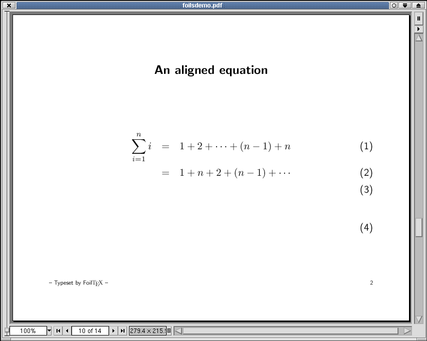
\foilhead{An aligned equation}
\pause
\parstepwise
{
\begin{eqnarray}
\sum_{i=1}^{n} i & \step{=} & \restep{1 + 2 + \cdots + (n-1) + n}\\
& \step{=} & \restep{1 + n + 2 + (n-1) + \cdots}\\
& \step{=} & \restep
{
\switch
{
\vphantom{\underbrace{(1 + n) +
\cdots + (1 + n)}_{\times\frac{n}{2}}}%
(1 + n) + \cdots + (1 + n)%
}
{\underbrace{(1 + n) + \cdots + (1 + n)}_{\times\frac{n}{2}}}%
}
\\
& \step{=} & \restep{\frac{(1 + n)\step{{}\cdot n}}{\restep{2}}}
\end{eqnarray}
}
\end{document}
See
Figure 1.17, “TexPower example: title page in Acrobat
Reader” and
Figure 1.18, “TexPower example: partial displayed page
2”.
http://texpower.sourceforge.net/ (last time checked: 2009-04-26)
“The purpose of the web package is to create a page layout for documents meant for screen presentation, whether over the WWW or classroom/conference presentations, in PDF. Such documents are not (necessarily) intended to be printed; consequently, the page layout is, in some sense, optimized for screen viewing. ”
Example 1.15. web.sty Example
\documentclass{article}

\usepackage[pdftex]{web}

\title{Some Title}
\author{\href{mailto:mw@miwie.in-berlin.de}{Michael Wiedmann}}

\university{Private Organization}
\email{mw@miwie.in-berlin.de}
\version{1.0}
\copyrightyears{2001}

\begin{document}

\maketitle
\tableofcontents

\section{First Section}
\begin{description}
\item [item1]description 1
\item [item2]description 2
\end{description}

\section{Another Section}

\begin{itemize}
\item item 1
\item item 2
\item item 3
\end{itemize}

\end{document}
See
Figure 1.19, “web.sty example: title page in Acrobat
Reader” and Figure 1.20,
“web.sty example: page in Acrobat Reader”.
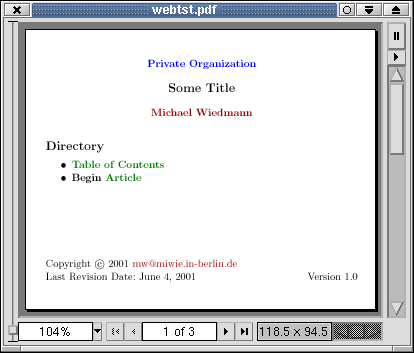
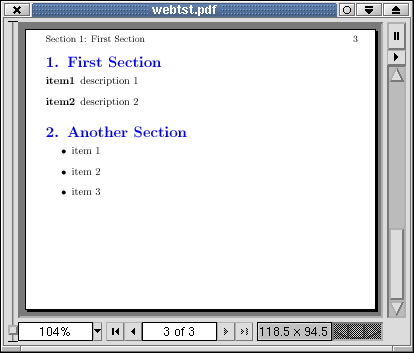
Table of Contents
This chapter lists tools which generate HTML as their main output format. Some of them might be able to generate other output formats too (like PS).
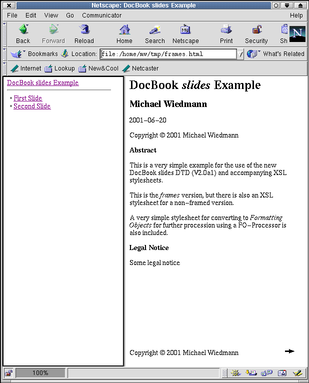
“dbslide is a package of files that allows you to create screen presentations, overheads, and handouts from a DocBook SGML document. ”
Example 2.1. DocBook dbslide Example
<!DOCTYPE Book PUBLIC "-//OASIS//DTD DocBook V4.1//EN">
<book>
 <bookinfo>
  <author>
   <firstname>Michael</firstname>
    <surname>Wiedmann</surname>
    <affiliation>
     <address format="linespecific">mw@miwie.in-berlin.de</address>
    </affiliation>
   </author>
   <title>DocBook dbslide Example</title>
 </bookinfo>
 <chapter>
  <title>Abstract</title>
  <para>A very simple demonstration of dbslide</para>
  <itemizedlist>
   <listitem>
    <para>item 1</para>
   </listitem>
   <listitem>
    <para>item 2</para>
   </listitem>
  </itemizedlist>
 </chapter>

 <chapter>
  <title>Key features</title>
  <simplesect>
   <title>Features</title>
   <itemizedlist>
    <listitem>
     <para>feature 1</para>
    </listitem>
    <listitem>
     <para>feature 2</para>
    </listitem>
    <listitem>
     <para>feature 3</para>
    </listitem>
   </itemizedlist>
  </simplesect>
 </chapter>
</book>
http://ourworld.compuserve.com/homepages/hoenicka_markus/dbslide.html (last time checked: not available as of 2009-04-23)
Norman Walsh created this DTD (Document Type Definition) as a customization of his “Simplified DocBook XML DTD” (see http://nwalsh.com/slides/). Included are XSL stylesheets for producing HTML output.
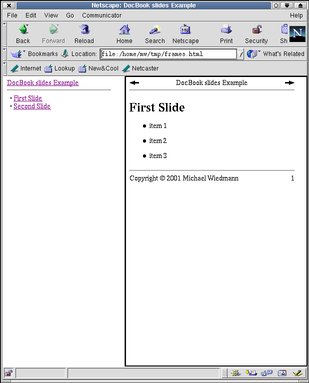
Example 2.2. DocBook slides Example
<!DOCTYPE slides PUBLIC "-//Norman Walsh//DTD Slides XML V2.0//EN"
                 "./slides.dtd">

<slides>

  <slidesinfo>
    <title>DocBook <emphasis>slides</emphasis> Example</title>
    <author>
      <firstname>Michael</firstname>
      <surname>Wiedmann</surname>
    </author>
    <date>2001-06-20</date>
    <copyright>
      <year>2001</year>
      <holder>Michael Wiedmann</holder>
    </copyright>
    <abstract>
      <para>This is a very simple example for the use
        of the new DocBook slides DTD (V2.0a1) and
        accompanying XSL stylesheets.
      </para>
      <para>This is the <emphasis>frames</emphasis>
        version, but there is also an XSL stylesheet
        for a non-framed version.
      </para>
      <para>A very simple stylesheet for converting to
        <emphasis>Formatting Objects</emphasis> for further
        procession using a FO-Processor is also included.
      </para>
    </abstract>
    <legalnotice>
      <title>Legal Notice</title>
      <para>Some legal notice</para>
    </legalnotice>
  </slidesinfo>

  <foil>
    <title>First Slide</title>
    <itemizedlist>
      <listitem>
        <para>item 1</para>
      </listitem>
      <listitem>
        <para>item 2</para>
      </listitem>
      <listitem>
        <para>item 3</para>
      </listitem>
    </itemizedlist>
  </foil>

  <foil>
    <title>Second Slide</title>
    <variablelist>
      <varlistentry>
        <term>term 1</term>
        <listitem>
          <para>description 1</para>
        </listitem>
      </varlistentry>
      <varlistentry>
        <term>term 2</term>
        <listitem>
          <para>description 2</para>
        </listitem>
      </varlistentry>
      <varlistentry>
        <term>term 3</term>
        <listitem>
          <para>description 3</para>
        </listitem>
      </varlistentry>
    </variablelist>
  </foil>

</slides>
See Figure 2.1,
“slides example: title page in Netscape” and
Figure 2.2,
“slides example: first page in Netscape”.
Because slides are a customization of the Simplified DocBook XML DTD you need to install this package too (not necessarily because the package contains a flattended version of the slides DTD).
To process the XML slide files an XSLT processor like
XT, Saxon, xsltproc
etc. is necessary.
http://sourceforge.net/projects/docbook/ (last time checked: 2009-04-23)
[DocBook is] Copyright 1992, 1993, 1994, 1995, 1996, 1998, 1999 HaL Computer Systems, Inc., O'Reilly & Associates, Inc., ArborText, Inc., Fujitsu Software Corporation, and the Organization for the Advancement of Structured Information Standards (OASIS).
Same license as DocBook:
Permission to use, copy, modify and distribute the DocBook
DTD and its accompanying documentation for any purpose and
without fee is hereby granted in perpetuity, provided that
the above copyright notice and this paragraph appear in all
copies.  The copyright holders make no representation about
the suitability of the DTD for any purpose.  It is provided
"as is" without expressed or implied warranty.
“Latex2slides is a simple graphical program that produces a set of HTML/JPEG slides from a TeX or LaTeX source. Each Postscript page is converted to a JPEG image using ImageMagick's convert. The program then makes one HTML page for each JPEG (or slide), and an index.html page. As a result, each page in your slide presentation corresponds to one of the Postscript pages you would obtain from the LaTeX source. ”
http://udel.edu/~lmilano/latex2slides/ (last time checked: not available as of 2009-04-23)
Table of Contents
This chapter lists tools which generate output formats other than PDF and/or HTML.
“DFBPoint is a simple presentation viewer that uses the DirectFB graphics library to draw to the Linux framebuffer ”
“The presentation is defined in an XML file (as described below) and refers to external data (images, fonts) via relative or absolute filenames. Relative filenames are interpreted relative to the directory the XML file lives. ”
Example 3.1. DFBPoint Example
<?xml version='1.0' encoding='iso-8859-1'?>

<slides bgcolor="#222266" fgcolor="#9999FF"
        bullet="bullet.png"
        face="decker.ttf" size="42"
        x="40" y="40"
        screen_width="1024" screen_height="768">

  <slide>
    <header fgcolor="#ff00cc" size="96">DFBPoint</header>
    <text></text>
    <text>DFBPoint is a slide viewer for presentations</text>
    <text></text>
    <text>Slides are defined in a simple XML syntax</text>
    <text>DirectFB is used for fast rendering</text>
  </slide>

   <slide bgcolor="#333333" fgcolor="#0033cc">
    <header fgcolor="#ff00cc" size="80">DFBPoint</header>
    <text>Foreground and background colors can be set</text>
    <text fgcolor="#22FF22">per slide or per line</text>
    <text></text>
    <text>Various font encodings are supported.</text>
    <text>Here are some strange letters: ÄÖÜäöüß</text>
  </slide>

  <slide bgimage="bg.png">
    <header fgcolor="#ff00cc" size="80">DFBPoint</header>
    <text>Supports background images</text>
    <text>and arbitrarily placed images or videos</text>
    <image x="20" y="300">wilber_stoned.png</image>
    <image x="200" y="300" width="400">wilber_stoned.png</image>
  </slide>

  <slide effect="slide top" bgimage="bg.png">
    <header fgcolor="#220066" size="80">Effects</header>
    <text>Slides can slide in ...</text>
  </slide>

  <slide effect="slide bottom left" bgimage="bg.png">
    <header fgcolor="#220066" size="80">Effects</header>
    <text>... from all directions ...</text>
  </slide>

  <slide effect="blend" bgimage="bg.png">
    <header fgcolor="#220066" size="80">Effects</header>
    <text>... or fade in ...</text>
  </slide>

  <slide effect="slide top right, blend">
    <header fgcolor="#ff00cc" size="80">Effects</header>
    <text>... or both.</text>
  </slide>

  <slide bgimage="bg.png">
    <header fgcolor="#ff00cc" size="80">Actions</header>
    <text>Commands can be bound to function keys</text>
    <listitem size="60">Press F1 to start df_neo</listitem>
    <listitem size="60">Press F2 to start df_andi</listitem>
    <action key="F1">df_neo</action>
    <action key="F2">df_andi</action>
  </slide>

</slides>
http://www.directfb.org/index.php?path=Projects%2FDFBPoint (last time checked: 2009-04-23)
“This is mechapoint, my simple presentation player written in C++. Mechapoint uses an XML file format, and displays it's graphics using Evas, the very funky, optionally OpenGL-accelerated canvas library from the Enlightenment project. ”
Example 3.2. mechapoint Example
<?xml version="1.0"?>
<mechapoint width="400" height="300">
  <page>
    <rectangle>
      <move x="0" y="0" />
      <resize w="400" h="300" />
      <color r="255" g="255" b="255" a="255" />
    </rectangle>
    <image filename="flower.png">
      <move x="100" y="50" />
      <resize w="150" h="100" />
      <imagefill w="150" h="100" />
    </image>
    <group>
      <ellipse w="10">
        <move x="52" y="82" />
        <color r="0" g="0" b="0" a="100" />
      </ellipse>
      <ellipse w="10">
        <move x="50" y="80" />
        <color r="255" g="0" b="0" a="255" />
      </ellipse>
    </group>
    <group>
      <text font="notepad" size="30" value="mechafoo!">
        <move x="102" y="82" />
        <color r="0" g="0" b="0" a="80" />
      </text>
      <text font="notepad" size="30" value="mechafoo!">
        <move x="100" y="80" />
        <color r="0" g="0" b="150" a="255" />
      </text>
    </group>
  </page>
  <page>
    <gradient_box>
      <move x="0" y="0" />
      <resize w="400" h="300" />
      <add_color r="100" g="100" b="255" a="255" />
      <add_color r="255" g="255" b="255" a="255" />
    </gradient_box>
    <rectangle>
      <move x="50" y="50" />
      <resize w="300" h="200" />
      <color r="255" g="255" b="255" a="100" />
    </rectangle>
    <textbox font="notepad" size="15" x="50" y="50" width="300">
      <para post_indent="100" first_indent="0" indent="100">
        This is a paragraph of foo. It contains quite a lot of
        information about foo and bar.
      </para>
      <para align="centre">Para 2</para>
      <para></para>
      <para align="right">Another para :)</para>
    </textbox>
  </page>
  <page>
    <gradient_box>
      <move x="0" y="0" />
      <resize w="400" h="300" />
      <add_color r="100" g="100" b="255" a="255" />
      <add_color r="255" g="255" b="255" a="255" />
    </gradient_box>
    <textbox font="notepad" size="20" x="20" y="20" width="360">
      <para align="centre">Welcome to Mechapoint!</para>
    </textbox>
    <group>
      <rectangle>
        <move x="21" y="51" />
        <resize w="360" h="2" />
        <color a="100" />
      </rectangle>
      <rectangle>
        <move x="20" y="50" />
        <resize w="360" h="2" />
        <color a="100" />
        <color r="255" g="255" b="255" a="255" />
      </rectangle>
    </group>
    <textbox font="Times_New_Roman" size="10" x="20" y="60" width="360">
      <para>Welcome to Mechapoint, a simple presentation program
        for Unix/Linux systems.
      </para>
      <para>Mechapoint reads presentation files, which are formatted
        in an XML format, and displays them using an Evas canvas.
        By harnessing the powerful display technology of Evas,
        Mechapoint allows you to create impressive graphical
        presentations with ease. Also, using XML allows you to use
        standard tools like XSLT to streamline your workload.
      </para>
      <para>normal bit<font color="#ff00007f">special bit</font>
        more normal bits
      </para>
      <para><font face="Webdings">=</font> bullet 1</para>
    </textbox>
  </page>
</mechapoint>
http://linuxgamers.net/lsd/mechapoint/ (last time checked: 2009-04-23)
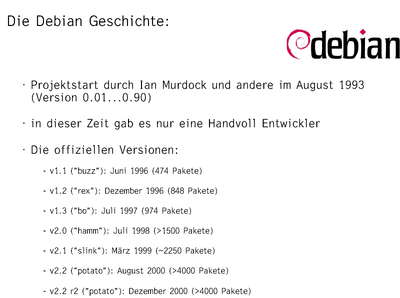
“Magic Point is an X11 based presentation tool. It is designed to make simple presentations easy while to make complicated presentations possible. Its presentation file (whose suffix is typically .mgp) is just text so that you can create presentation files quickly with your favorite editor (e.g. Emacs, vi). ”
Example 3.3. mgp Example
%include "default.mgp"
%deffont "standard" tfont "Apgabk.TTF"
%deffont "standard" tfont "trebuc.ttf"
%deffont "standard" tfont "Ressurec.ttf"
%page
%nodefault
%font "standard"
%back "white"
%center

%image "openl2.ppm"
%size 2, fore "black"

...


%%%%%%%%%%%%%%%%%%%%%%%%%%%%%%%%%%%%
%page
%nodefault
%left
%font "standard"

%size 5, fore "black"
 Die Debian Geschichte:
%right
%image "logo-50.jpg", image "debian.jpg"

%left, size 4, fore "black"
    · Projektstart durch Ian Murdock und andere im August 1993
      (Version 0.01...0.90)

    · in dieser Zeit gab es nur eine Handvoll Entwickler

    · Die offiziellen Versionen:
%size 3

            - v1.1 ("buzz"): Juni 1996 (474 Pakete)

            - v1.2 ("rex"): Dezember 1996 (848 Pakete)

            - v1.3 ("bo"): Juli 1997 (974 Pakete)

            - v2.0 ("hamm"): Juli 1998 (>1500 Pakete)

            - v2.1 ("slink"): März 1999 (~2250 Pakete)

            - v2.2 ("potato"): August 2000 (>4000 Pakete)

            - v2.2 r2 ("potato"): Dezember 2000 (>4000 Pakete)

            - v2.3 ("woody"): ??? (bisher fast 6200 Pakete)
%%%%%%%%%%%%%%%%%%%%%%%%%%%%%%%%%%%%
See Figure 3.1,
“mgp example in Acrobat Reader”.
http://www.mew.org/mgp/ (last time checked: not available as of 2009-04-23)
Copyright (C) 1997 and 1998 WIDE Project.
Redistribution and use in source and binary forms, with
or without modification, are permitted provided that the
following conditions are met:
1. Redistributions of source code must retain the
   above copyright notice, this list of conditions
   and the following disclaimer.
2. Redistributions in binary form must reproduce the
   above copyright notice, this list of conditions
   and the following disclaimer in the documentation
   and/or other materials provided with the distribution.
3. Neither the name of the project nor the names of its
   contributors may be used to endorse or promote
   products derived from this software without specific
   prior written permission.
See http://puchol.com/cpg/software/mgp/ for some examples of templates for mgp.
Table of Contents
- 1 Active-DVI
- 2 Combined Slidemaker
- 3 ConTeXt
- 4 deck.js
- 5 elpres
- 6 Fathom.js
- 7 gpresent
- 8 HavenPoint
- 9 HTML Slidy
- 10 ImPress
- 11 impress.js
- 12 Impress!ve
- 13 Java Power Presenter - JPP
- 14 JackSVG
- 15 Lecturer
- 16 LyX
- 17 marSLIDE
- 18 mozPoint
- 19 Orator
- 20 pandoc
- 21 pdfslide
- 22 pdfwin
- 23 Pointless
- 24 powerdot
- 25 PPPSlides
- 26 Present
- 27 Prestimel
- 28 pylize
- 29 Pyslide
- 30 reveal.js
- 31 S5
- 32 S5 Reloaded
- 33 screen.sty
- 34 Slide40
- 35 Slidemaker
- 36 SlideML
- 37 slides
- 38 slides.sh
- 39 Slideshow
- 40 Spork
- 41 talk
- 42 TeX4ht: LaTeX and TeX for Hypertext
- 43 TPP Text Presentation Program
- 44 Utopia PDF Presentations Bundle
- 45 wiki2beamer
- 46 WML - Website META Language
- 47 xdvipresent
- 48 XSLies
- 49 xsw
- 50 XUL Slideshow Toolkit
This chapter lists tools which I haven't had time to evaluate yet. Feel free to email me your contribution!
“The tool I propose is a collection of XSLT stylesheets with four different "entry points" (ie, main, top level templates, all others serving as "utilities" for the run-time). Depending on the entry point, the same source file can be transformed into: 1. A series of XHTML (note the 'X'!) slides, linked into a sequence. This is a more "modern" version of the old slidemaker, but using XSLT instead of a perl hack. 2. One single XHTML file, including all the slides, and prepared for the CSS2 "projection" mode usage. The output of each slide is essentially identical to the individual slides of the previous alternative, but everything is bound to one file. 3. A series of SVG slides, linked into a sequence. 4. One single SVG file, using an SVG animation tricks to step through the individual slides.”
http://www.w3.org/Consortium/Offices/Presentations/xsltSlidemaker/ (last checked: 2010-03-27)
http://www.pragma-ade.com (last checked: 2010-03-27)
“A JavaScript library for building modern HTML presentations. deck.js is flexible enough to let advanced CSS and JavaScript authors craft highly customized decks, but also provides templates and themes for the HTML novice to build a standard slideshow.”
https://github.com/imakewebthings/deck.js (last checked: 2011-08-27)
“Elpres is a simple class for writing presentations to be shown on screen or beamer. It is derived from LaTeX's article class.”
Example 4.1. elpres Example
\documentclass[pdftex,12pt]{elpres}

\usepackage[latin1]{inputenc}
\usepackage{pifont}
\usepackage{color}

\definecolor{blue}{rgb}{0,0,0.7}

\usepackage[document]{ragged2e}
\RaggedRight
\raggedright

\begin{document}
\begin{titlepage}
\vspace*{9mm}
\begin{center} \Huge
 \bfseries \textcolor{blue}{Title of a presentation written with the \\
    \texttt{elpres} class}
\end{center}

\begin{center}
\large
Author\\[1ex]Institution
\end{center}
\end{titlepage}

\begin{psli}[Title]
The first page

\begin{citemize}
  \item One
  \item Two
\end{citemize}

\begin{cenumerate}
  \item the first enumerated item
  \item the second enumerated item
\end{cenumerate}

\begin{cdescription}
  \item [One] described item
  \item [Another] described item
\end{cdescription}

\end{psli}

\begin{rsli}
The second page
\end{rsli}

\end{document}
http://freenet-homepage.de/vkiefel/elpres.html (last checked: 2010-03-27)
“Write your slideshow in HTML, style it with CSS and control it with some jQuery-powered JavaScript. ”
http://markdalgleish.com/projects/fathom/ (last checked: 2011-06-18)
“gpresent consists
of a macro package present.tmac for
use with groff and a postprocessor presentps for manipulation of the PostScript
output of groff.
”
- groff (version 1.18.1 dated Oct 3, 2002 or higher/later) with the mm macros (included with groff) -- groff.ffii.org
- perl (version 5.x)
- ps2pdf
http://www.science.uva.nl/~bobd/useful/gpresent/ (last checked: 2010-03-27)
“HavenPoint is an open source application that generates PDF slide presentations from XML source files. It is based on the PythonPoint demo application included with ReportLab, available from http://www.reportlab.com/. ”
“This slide show can be driven in the same way as Power Point. To advance to the next slide click anywhere on the page with the mouse, or press the space bar. You can move forwards or backwards through the slides with the Cursor left, Cursor right, Pg Up and Pg Dn keys. The font size is automatically adjusted to match the browser's window width, but you can also adjust it manually using the "S" key for smaller and the "B" key for bigger. You can also use the "<" and ">" keys. Before printing, use the "A" key to toggle between current slide and all slides. Use the "F" key to switch off/on the bottom status line. The "K" key toggles the use of mouse click to advance to the next slide. You can use "C" to show the table of contents and any other key to hide it. Use the "F11" key to toggle the browser's full screen mode. Press "H" to get to this page. Note that not all keys are supported in all browsers, as browsers may reserve some keys for browser control and this varies from one browser to the next.”
http://www.w3.org/Talks/Tools/Slidy/ (last checked: 2010-07-27)
“ImPress is a WYSIWYG layout program designed especially for Linux. It allows you to create presentations and Postscript documents using fully scalable graphics similar to programs like Macromedia Freehand, Corel Draw, Adobe Illustrator and Visio. It is different from raster graphic packages like gimp, Adobe PhotoShop and Jasc's PaintShop Pro in that it deals with graphical objects which can be manipulated on a canvas rather than just layers of paint. ”
http://www.ntlug.org/~ccox/impress/ (last checked: 2010-03-27)
“It's a presentation framework based on the power of CSS3 transforms and transitions in modern browsers and inspired by the idea behind prezi.com ”
https://github.com/bartaz/impress.js (last checked: 2012-02-05)
“Impressive is a program that displays presentation slides. But unlike OpenOffice.org Impress or other similar applications, it does so with style. Smooth alpha-blended slide transitions are provided for the sake of eye candy, but in addition to this, Impressive offers some unique tools that are really useful for presentations. Read below if you want to know more about these features. Creating presentations for Impressive is very simple: You just need to export a PDF file from your presentation software. This means that you can create slides in the application of your choice and use Impressive for displaying them. If your application does not support PDF output, you can alternatively use a set of pre-rendered image files – or you use Impressive to make a slideshow with your favorite photos.”
“The Java Power Presenter enables you to define PowerPoint-like foils in LaTeX. It offers you a platformindependent way to build presentations and makes it possible to reuse all your previously written LaTeX code. You don't have to convert or rewrite the written text and formulas and can preserve all your layout. ”
“JackSVG is a program which allows you to create SVG slide presentations. Scalable Vector Graphics (SVG) is an open technology from the W3C for describing vector graphics on the Web. JackSVG allows you to create presentations that you can publish on the Web and distribute freely - without requiring your audience to have proprietary presentation software to view it. ”
“The package creates slides for on-screen presentations based on PDF features without manipulating TeX’s typesetting process. The presentation flow relies on PDF’s abilities to display content step by step. ”
“Its main features are maximum control of what's going on and thus flexibility (unlike e.g. Beamer) and use of PDF layers, and it works with all formats, except ConTeXt IV (clashes in PDF management). ”
http://tug.ctan.org/cgi-bin/ctanPackageInformation.py?id=lecturer (last checked: 2010-09-19)
http://www.lyx.org (Last ckecked: 2010-03-27)
http://www.cds.caltech.edu/~wgm/WARM/slides/ (Last ckecked: 2010-03-27)
“MozPoint is a presentation library (of CSS and JS) that can be used to make simple but elegant presentations using the browser as a platform for rendering presentation content. With kiosks mode this can do a pretty decent job.”
http://mozpoint.mozdev.org/index.html (Last ckecked: 2010-03-27)
“Orator is a set of scripts, written in PHP and using the Horde framework, to define and export XML-based presentations to a variety of formats.”
“Pandoc is a Haskell library for converting from one markup format to another, and a command-line tool that uses this library. It can read markdown and (subsets of) reStructuredText, HTML, and LaTeX, and it can write markdown, reStructuredText, HTML, LaTeX, ConTeXt, PDF, RTF, DocBook XML, OpenDocument XML, ODT, GNU Texinfo, MediaWiki markup, groff man pages, and S5 HTML slide shows.”
http://johnmacfarlane.net/pandoc/ (last checked: 2010-03-27)
http://www.ctan.org/pkg/pdfslide (last checked: 2014-11-08)
“The pdfwin package can be used for presentations on conferences or seminars. The package provides three prefined windows (e.g. text window and navigation panel) which are widely customizable. ”
http://www.uni-frankfurt.de/~muehlich/tex/texindex.html (last checked: 2010-03-27)
“Pointless is a presentation tool primarily targeted at the un*x world. Presentations are made using a simple markup-language (best described as a mix between TeX and Pod, and affectionately known as "The Pointless Language"). The resulting slideshow is rendered using FreeType and OpenGL for optimal visual quality. Hardware accelerated OpenGL is highly recommended but not required in order to run pointless. The pointless tool is designed in an extensible way, allowing the user to make simple presentations with minimal effort, yet providing for more complicated presentations through the inclusion (or, if necessary, coding) of extension modules. ”
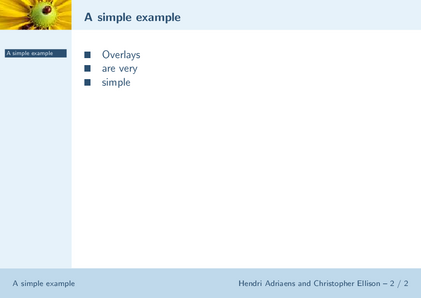
“powerdot is a presentation class for LaTeX that allows for the quick and easy development of professional presentations. It comes with many tools that enhance presentations and aid the presenter. Examples are automatic overlays, personal notes and a handout mode. To view a presentation, DVI, PS or PDF output can be used. A powerful template system is available to easily develop new styles. ”
Example 4.2. powerdot Example
\documentclass{powerdot}

\pdsetup{
  lf=A simple example,
  rf=Hendri Adriaens and Christopher Ellison
}

\title{A simple example}
\author{Hendri Adriaens \and Christopher Ellison}

\begin{document}

\maketitle

\begin{slide}{A simple example}
  \begin{itemize}
    \item Overlays \pause
    \item are very \pause
    \item simple
  \end{itemize}
\end{slide}

\end{document}
The list of mandatory packages can be found in the PDF documentation of the powerdot class.
http://www.ctan.org/tex-archive/macros/latex/contrib/powerdot/ (last checked: 2010-03-27)
“The package offers a collection of simple macros for preparing presentations in Plain TeX. Slide colour and text colour may be set, links between parts of the presentation, to other files, and to web addresses may be inserted. Images may be included easily. ”
http://mirror.ctan.org/macros/plain/contrib/present.zip (last checked: 2010-09-19)
“PresTiMeL is a tool to create presentations from a XML-file. For each slide, PresTiMeL will create one (or a set of) HTML file(s), which can be shown in a Web browser of your choice. Cascading Style Sheets are used to provide the minor details of text styling, font, and color. ”
“pylize is a Python script that makes the creation of on-screen presentations a matter of a few minutes. It generates a template master document, which you can edit with your favourite text or HTML editor. The master document is then processed by pylize to generate HTML files for every slide plus a file for the table of contents. You can view the presentation with any CSS-capable webbrowser. ”
http://www.chrisarndt.de/en/software/pylize/index.html (last checked: 2010-03-28)
“Pyslide is a tiny program to make presentations. It is written in Python and uses SDL (through pygame), so (theorycally) it can be used in any platform. ”
“A framework for easily creating beautiful presentations using HTML. Check out the live demo. reveal.js comes with a broad range of features including nested slides, markdown contents, PDF export, speaker notes and a JavaScript API. It's best viewed in a browser with support for CSS 3D transforms but fallbacks are available to make sure your presentation can still be viewed elsewhere. ”
https://github.com/hakimel/reveal.js (last checked: 2013-01-05)
Live demo: http://lab.hakim.se/reveal-js/#/ (last checked: 2013-01-05)
“S5 is a slide show format based entirely on XHTML, CSS, and JavaScript. With one file, you can run a complete slide show and have a printer-friendly version as well. The markup used for the slides is very simple, highly semantic, and completely accessible. Anyone with even a smidgen of familiarity with HTML or XHTML can look at the markup and figure out how to adapt it to their particular needs. Anyone familiar with CSS can create their own slide show theme. It's totally simple, and it's totally standards-driven. ”
http://www.meyerweb.com/eric/tools/s5/ (last checked: 2010-11-13)
“My name is Christian and my profession is web design and programming. When I searched for a browser based slide show system which should answer my personal needs I encountered S5 (Simple Standards-based Slide Show System) from Eric Meyer. This format/program could match my concept of a slide show system best. Since the control panel and the features did not please me at all - I thought it could be a good thing to extend S5 to a higher level. I paid attention with programming especially to get a high compatibility with the Gecko, KHTML/WebKit and Opera engine. That IE thereby would fail was no intention. So I decided to create a second version with less features (no sound & no charts) but fully compatible with IE 6/7. This version is named S5 1.29 a.k.a. one4all. ”
http://www.netzgesta.de/S5/ (last checked: 2010-11-13)
The package contains “three small packages, screen.sty, manuscript.sty, and poster.sty. The screen package is used to format the output for a screen presentation; the manuscript package for a manuscript; and the poster package for a poster. ”
http://web.as.uky.edu/statistics/users/dmallen/oldpage/latex/latex.html (last time checked: 2010-03-28)
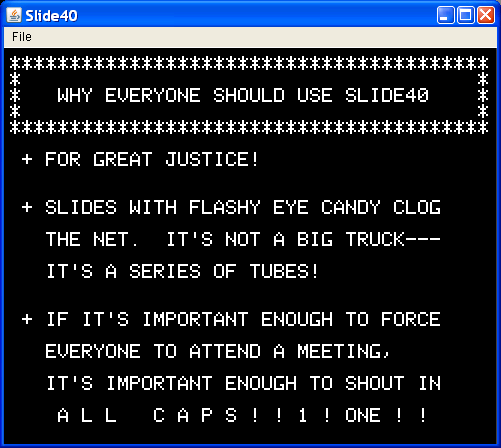
“Slide40 is a program for displaying slide presentations in a style inspired by the personal computers of the late 1970's. The display mimics a TV screen showing only 40 columns of text in an all-caps font built from big blocky fuzzy pixels. I created it partly as a joke, and partly as a minimalist artistic reaction to the highly-decorative but meaningless presentations made by abusers of modern presentation software. ”
http://alum.wpi.edu/~tfraser/Software/Slide40/index.html (last checked: 2010-03-28)
http://slidemaker.sourceforge.net (last checked: 2010-03-28)
“SlideML is a XML format for Slideshows. You need CSS, XSLT or any other programming language to transform it in some human enjoyable form.”
http://slideml.org/ (last checked: 2010-03-28)
Slides use a bigger base font size, suitable for presentation material, and the slides class provides an easy way to make overlays -- a slide which can be laid on top of a previous slide to fill in certain gaps.
For an example see http://www.colorado.edu/ITS/docs/latex/Unix/examples/sampleC.html
The LaTeX project announced in LaTeX News 11 on June 1999, that the class will be unsupported in the future.
“slides.sh is a shell script written with the intention of generate HTML slides simply with tools you can put on one floppy (for example a GNU/Linux Slackware rescue-like floppy). ”
http://fx.lebail.free.fr/slides.sh/ (last checked: 2010-03-28)
“Slideshow is a DrScheme-supported language for creating and running slide presentations. It's an alternative to PowerPoint (which offers little abstraction), HTML generation (which is inflexible), or PDF generation (which is static and often displays poorly).”
“Spork lets you create HTML slideshow presentations easily. It comes with a sample slideshow. All you need is a text editor, a browser and a topic. Spork allows you create an entire slideshow by editing a single file called Spork.slides (by default). Each slide is created using a minimal markup language similar to the syntax used in Kwiki wikis.”
http://search.cpan.org/~ingy/Spork-0.20/lib/Spork.pm (last checked: 2010-03-28)
“The talk document class allows you to create slides for screen presentations or printing on transparencies. It also allows you to print personal notes for your talk. You can create overlays and display structure information (current section / subsection, table of contents) on your slides. The main feature that distinguishes talk from other presentation classes like beamer or prosper is that it allows the user to define an arbitrary number of slide styles and switch between these styles from slide to slide. This way the slide layout can be adapted to the slide content. For example, the title or contents page of a talk can be given a slightly different layout than the other slides.”
CTAN:/macros/latex/contrib/talk (last checked: 2010-03-28)
“TeX4ht is a highly configurable TeX-based authoring system for producing hypertext. It interacts with TeX-based applications through style files and postprocessors, leaving the processing of the source files to the native TeX compiler. Consequently, TeX4ht can handle the features of TeX-based systems in general, and of the LaTeX and AMS style files in particular. ”
http://www.tug.org/tex4ht/ (last checked: 2010-03-26)
“tpp stands for text presentation program and is an ncurses-based presentation tool. The presentation can be written with your favorite editor in a simple description format and then shown on any text terminal that is supported by ncurses - ranging from an old VT100 to the Linux framebuffer to an xterm. ”
Example 4.3. TPP Example
--author Andreas Krennmair <ak@synflood.at>
--title Test for TPP
--date today
--withborder
This is the abstract, which is pretty cool.
It consists of several lines.
--newpage
--withborder
This is the next page, which also consists of
several lines
blubber. bla.
--newpage
--withborder
asdf jklö asdf jklö asdf jklö asdf jklö
http://www.ngolde.de/tpp/ (last checked: 2010-03-28)
“The Utopia PDF Presentations Bundle provides accessories which facilitate the production of stunning PowerPoint-like presentations from (La)TeX source. The process requires generation of PDF by way of PostScript, as some effects (notably "builds/incremental display") are implemented by post-processing the PostScript generated from TeX. ”
“The heart of the Bundle is two LaTeX packages and the PostScript post-processor; the Bundle also contains documentation, examples and other support materials. (The plain TeX system which formed the foundation for the Bundle is being rewritten to match the new functionalities introduced during development of the LaTeX version; it will be added to the Bundle for the benefit of die-hard plain TeXers sometime in the future.) ”
“wiki2beamer is a small tool to create LaTeX Beamer presentations from text files with a wiki-like syntax. Thus, it enables the user to create beamer presentations in a less time-consuming way.”
http://www-user.tu-chemnitz.de/~mren/wiki2beamer/doku.php (last checked: 2010-03-28)
“WML is a free HTML generation toolkit for Unix, internally consisting of 9 independent languages. The main idea of WML is a sequential filtering scheme where each language provides one of 9 processing passes. So WML reads an input file, applies passes 1-9 (or optionally only the passes specified) and finally produces one or more output files. ”
http://www.engelschall.com/sw/wml/ (last checked: 2010-03-28)
“xdvipresent provides glue for developing slides for on-line presentation using LaTeX and xdvi, and a (portable) computer with a XGA (1024x768), SVGA (800x600), VGA (640x480), or SUN (1152x900) screen running Xwindows.The idea is that you prepare the slides in LaTeX with the enclosed style file(s) and you use the xdvipresent script (which simply calls xdvi with an appropriate set of options) to show the slides on the screen. The package also provides tips on preparing presentations with xdvi, for starting xdvipresent from emacs, etc.”
http://clip.dia.fi.upm.es/Software/xdvipresent_html/xdvipresent.html (last checked: 2010-03-28)
“XSLies [pronounced: "excess lies"] is a simple XSLT application for making Web-based presentations. It uses a simple XML input file to generate an HTML slideset. The resulting layout is completely customizable using XSL and CSS. ”
“xsw is a slideshow presentation tool for all those who are frustrated with Microsoft PowerPoint and its clones. By using xsw, you create your presentation "by hand", using the xsw language described in the manual. ”
http://code.google.com/p/xsw/ (last checked: 2010-03-28)
“This is a patched version of the Takahashi-method XUL slideshow found at http://piro.sakura.ne.jp. With this tool you can create slideshows in minutes. We use it whenever we have to prepare a talk and have no time at all. We enhanced the basic version with: Better CSS and faded background; Company logo; Full-screen image support; Tranlsated help; Removed japanese-specific fonts ”
http://blog.seesaw.it/pages/slideshow(last checked: 2010-03-28)
Table of Contents
This chapter lists some hints and tricks which might be useful in creating online presentations.
Herman Bruyninckx submitted the following macros to start up movies or other programs from within a PDF presentation made with LaTeX:
The key is to write a little shell-script and launch it from within pdflatex.
In the shell-script you should simply
call a standard unix tool for viewing video files, e.g.:
mpeg_play -controls off -dither color -position +128+96 video.mpg
Name this script for example videoscript.sh and make it executable. Defining
the following two new commands in pdflatex,
\newcommand{\pdflaunch}[1] {\pdfpageattr{/AA << /O << /S /Launch /F (#1) >>>>}}
\newcommand{\pdflaunchlink}[2]{%
      \pdfannotlink attr{/Border [0 0 0]} user{/Subtype /Link /A << %
        /S /Launch /F (#1) >>}%
      \pdfliteral{0 1 0 0 k}%
      {#2}\pdfliteral{0 0 0 1 k}\pdfendlink%
      }
you have either the possibility to launch this script instantly with a new slide:
\pdflaunch{videoscript.sh}
or after pressing a special link defined by:
\pdflaunchlink{videoscript.sh}{Start video}
Don't forget to kill the video application when it is not needed anymore. For this purpose again define a little script e.g.:
killall mpeg_play
and call it as mentioned above.
Uwe Brauer submitted the following hint how to call shell
scripts form within PDF using a recent version of hyperref:
\href{run:matlabcall2}{\fcolorbox{black}{mygrey}{Euler-estab}}
The magic is the string run: which
is followed by the name of the script.
Table of Contents
The idea for a document covering the topic of creating screen based or online presentations came to my mind around spring 2000. At that time I had a few interesting discussions with Werner Heuser, who was also planning such a documentation project. Unfortunately both of us didn't find the spare time to begin with this project until recently.
Quite a few of the listed tools are taken from Werner Heuser's “Linux on the Road; A Guide to Laptops and Mobile Devices”. The printed version contains an additional chapter “Lectures, Presentations, Animations and Slideshows”, which covers also most of the solutions presented in this documentation.
In March 2001 I had to prepare a talk again and began once more to look around for a possible tool chain. Finally this was the reason I started writing this documentation in the hope it will be useful for others in similar situations.
In March 2004 I decided to convert the source files to DocBook XML (V4.3) and to generate the various output formats using an XSLT processor with customized XSL stylesheets.
Because I get more and more emails complaining about incorrect sections Pros and Cons I deleted all these sections.
In March 2009 I had a first look in one of the popluar formats for ebooks ePub and found that the most recent version of the Docbook XSL stylesheets (1.74.3) already has (experimental) support for generating ePub output. The first tests were very promising so I decided to provide an ePub version with future relases of this project.
The source format of this document is DocBook XML (V4.3).
Generation of the various output formats use the following toolchains controlled by a
Makefile:
- HTML, TXT
-
xsltproc
(libxml2-2.7.6/libxslt-1.1.26)
with DocBook XSL Stylesheets (V1.75.2) (customized) - ePub
-
xsltproc
(libxml2-2.7.6/libxslt-1.1.26)
with DocBook XSL Stylesheets (V1.75.2)
Contributions are very welcome! If you know some tool which is not yet covered in this document or want to contribute additional information for an already listed solution please email me your contribution.
- V0.2.8 14-11-09
- V0.2.7 12-02-05
-
- Added deck.js
- Added impress.js
- V0.2.6 11-06-19
- V0.2.5 10-07-27
-
- Added note about donating using http://flattr.com
- Renamed Slide Show Help to HTML Slidy
- V0.2.4 10-03-28
-
- Updated some URLs; checked most links
- V0.2.3 09-07-30
-
- Experimental PDF version.
- Updated some changed links.
- Added section pandoc.
- V.2.2 09-04-24
-
- Added section xsw.
- Added URL last checked information.
- Updated some changed links.
- V0.2.1 09-04-10
-
- Added section wiki2beamer.
- V0.2.0 09-03-29
-
- ePub output available.
- Added section Impressive.
- V0.1.20 07-12-27
-
- Added section HTML Slidy.
- V0.1.19 07-10-27
-
- Added section XUL Slideshow Toolkit.
- Added section Spork.
- Added section S5 Reloaded.
- Added example output to section Slide40.
- V0.1.18 07-10-05
-
- Added section Slide40
- Dropped PDF output format
- V0.1.17 06-10-03
-
- Added example for section KeyJnote.
- V0.1.16 05-10-03
-
- Added example for section powerdot.
- V0.1.15 05-09-04
-
- Added section powerdot.
- V0.1.14 05-08-06
- V0.1.13 05-01-23
-
- Added section screen.sty.
- V0.1.12 04-11-04
-
- Added section IPE.
- V0.1.11 04-10-23
-
- Added elpres example.
- Added section SlideML.
- V0.1.10 04-09-20
-
- Added section elpres.
- V0.1.9 04-09-02
-
- Added section Slideshow.
- V0.1.8 04-08-07
-
- Added section TPP.
- V0.1.7 04-07-30
-
- Added section mozPoint.
- V0.1.6 04-07-21
-
- Added section TextView.
- Switched to DocBook XML V4.3
- V0.1.5 04-06-02
-
- Added section Slidemaker.
- V0.1.4 04-05-21
-
- PDF file now optimized/linearized.
- Added section Orator.
- V0.1.3 04-04-19
-
- Cleaned up inconsistencies of some names.
- V0.1.2 04-04-12
-
- Added section Combined Slidemaker.
- V0.1.1 04-04-10
-
- Version control system changed from CVS to SVN.
- Added section Pyslides.
- Corrected minor typos.
- V0.1.0 04-03-22
-
- Source format switched to DocBook XML (V4.3). Using DocBook XSL Stylesheets (V1.75.2), and DB2LaTeX XSL Stylesheets for generating the various output formats.
- Omitted all sections Pros and Cons.
- V0.0.1 01-03-10
-
- Initial release.
               GNU Free Documentation License
                   Version 1.1, March 2000

 Copyright (C) 2000  Free Software Foundation, Inc.
     59 Temple Place, Suite 330, Boston, MA  02111-1307  USA
 Everyone is permitted to copy and distribute verbatim copies
 of this license document, but changing it is not allowed.


0. PREAMBLE

The purpose of this License is to make a manual, textbook, or other
written document "free" in the sense of freedom: to assure everyone
the effective freedom to copy and redistribute it, with or without
modifying it, either commercially or noncommercially.  Secondarily,
this License preserves for the author and publisher a way to get
credit for their work, while not being considered responsible for
modifications made by others.

This License is a kind of "copyleft", which means that derivative
works of the document must themselves be free in the same sense.  It
complements the GNU General Public License, which is a copyleft
license designed for free software.

We have designed this License in order to use it for manuals for free
software, because free software needs free documentation: a free
program should come with manuals providing the same freedoms that the
software does.  But this License is not limited to software manuals;
it can be used for any textual work, regardless of subject matter or
whether it is published as a printed book.  We recommend this License
principally for works whose purpose is instruction or reference.


1. APPLICABILITY AND DEFINITIONS

This License applies to any manual or other work that contains a
notice placed by the copyright holder saying it can be distributed
under the terms of this License.  The "Document", below, refers to any
such manual or work.  Any member of the public is a licensee, and is
addressed as "you".

A "Modified Version" of the Document means any work containing the
Document or a portion of it, either copied verbatim, or with
modifications and/or translated into another language.

A "Secondary Section" is a named appendix or a front-matter section of
the Document that deals exclusively with the relationship of the
publishers or authors of the Document to the Document's overall subject
(or to related matters) and contains nothing that could fall directly
within that overall subject.  (For example, if the Document is in part a
textbook of mathematics, a Secondary Section may not explain any
mathematics.)  The relationship could be a matter of historical
connection with the subject or with related matters, or of legal,
commercial, philosophical, ethical or political position regarding
them.

The "Invariant Sections" are certain Secondary Sections whose titles
are designated, as being those of Invariant Sections, in the notice
that says that the Document is released under this License.

The "Cover Texts" are certain short passages of text that are listed,
as Front-Cover Texts or Back-Cover Texts, in the notice that says that
the Document is released under this License.

A "Transparent" copy of the Document means a machine-readable copy,
represented in a format whose specification is available to the
general public, whose contents can be viewed and edited directly and
straightforwardly with generic text editors or (for images composed of
pixels) generic paint programs or (for drawings) some widely available
drawing editor, and that is suitable for input to text formatters or
for automatic translation to a variety of formats suitable for input
to text formatters.  A copy made in an otherwise Transparent file
format whose markup has been designed to thwart or discourage
subsequent modification by readers is not Transparent.  A copy that is
not "Transparent" is called "Opaque".

Examples of suitable formats for Transparent copies include plain
ASCII without markup, Texinfo input format, LaTeX input format, SGML
or XML using a publicly available DTD, and standard-conforming simple
HTML designed for human modification.  Opaque formats include
PostScript, PDF, proprietary formats that can be read and edited only
by proprietary word processors, SGML or XML for which the DTD and/or
processing tools are not generally available, and the
machine-generated HTML produced by some word processors for output
purposes only.

The "Title Page" means, for a printed book, the title page itself,
plus such following pages as are needed to hold, legibly, the material
this License requires to appear in the title page.  For works in
formats which do not have any title page as such, "Title Page" means
the text near the most prominent appearance of the work's title,
preceding the beginning of the body of the text.


2. VERBATIM COPYING

You may copy and distribute the Document in any medium, either
commercially or noncommercially, provided that this License, the
copyright notices, and the license notice saying this License applies
to the Document are reproduced in all copies, and that you add no other
conditions whatsoever to those of this License.  You may not use
technical measures to obstruct or control the reading or further
copying of the copies you make or distribute.  However, you may accept
compensation in exchange for copies.  If you distribute a large enough
number of copies you must also follow the conditions in section 3.

You may also lend copies, under the same conditions stated above, and
you may publicly display copies.


3. COPYING IN QUANTITY

If you publish printed copies of the Document numbering more than 100,
and the Document's license notice requires Cover Texts, you must enclose
the copies in covers that carry, clearly and legibly, all these Cover
Texts: Front-Cover Texts on the front cover, and Back-Cover Texts on
the back cover.  Both covers must also clearly and legibly identify
you as the publisher of these copies.  The front cover must present
the full title with all words of the title equally prominent and
visible.  You may add other material on the covers in addition.
Copying with changes limited to the covers, as long as they preserve
the title of the Document and satisfy these conditions, can be treated
as verbatim copying in other respects.

If the required texts for either cover are too voluminous to fit
legibly, you should put the first ones listed (as many as fit
reasonably) on the actual cover, and continue the rest onto adjacent
pages.

If you publish or distribute Opaque copies of the Document numbering
more than 100, you must either include a machine-readable Transparent
copy along with each Opaque copy, or state in or with each Opaque copy
a publicly-accessible computer-network location containing a complete
Transparent copy of the Document, free of added material, which the
general network-using public has access to download anonymously at no
charge using public-standard network protocols.  If you use the latter
option, you must take reasonably prudent steps, when you begin
distribution of Opaque copies in quantity, to ensure that this
Transparent copy will remain thus accessible at the stated location
until at least one year after the last time you distribute an Opaque
copy (directly or through your agents or retailers) of that edition to
the public.

It is requested, but not required, that you contact the authors of the
Document well before redistributing any large number of copies, to give
them a chance to provide you with an updated version of the Document.


4. MODIFICATIONS

You may copy and distribute a Modified Version of the Document under
the conditions of sections 2 and 3 above, provided that you release
the Modified Version under precisely this License, with the Modified
Version filling the role of the Document, thus licensing distribution
and modification of the Modified Version to whoever possesses a copy
of it.  In addition, you must do these things in the Modified Version:

A. Use in the Title Page (and on the covers, if any) a title distinct
   from that of the Document, and from those of previous versions
   (which should, if there were any, be listed in the History section
   of the Document).  You may use the same title as a previous version
   if the original publisher of that version gives permission.
B. List on the Title Page, as authors, one or more persons or entities
   responsible for authorship of the modifications in the Modified
   Version, together with at least five of the principal authors of the
   Document (all of its principal authors, if it has less than five).
C. State on the Title page the name of the publisher of the
   Modified Version, as the publisher.
D. Preserve all the copyright notices of the Document.
E. Add an appropriate copyright notice for your modifications
   adjacent to the other copyright notices.
F. Include, immediately after the copyright notices, a license notice
   giving the public permission to use the Modified Version under the
   terms of this License, in the form shown in the Addendum below.
G. Preserve in that license notice the full lists of Invariant Sections
   and required Cover Texts given in the Document's license notice.
H. Include an unaltered copy of this License.
I. Preserve the section entitled "History", and its title, and add to
   it an item stating at least the title, year, new authors, and
   publisher of the Modified Version as given on the Title Page.  If
   there is no section entitled "History" in the Document, create one
   stating the title, year, authors, and publisher of the Document as
   given on its Title Page, then add an item describing the Modified
   Version as stated in the previous sentence.
J. Preserve the network location, if any, given in the Document for
   public access to a Transparent copy of the Document, and likewise
   the network locations given in the Document for previous versions
   it was based on.  These may be placed in the "History" section.
   You may omit a network location for a work that was published at
   least four years before the Document itself, or if the original
   publisher of the version it refers to gives permission.
K. In any section entitled "Acknowledgements" or "Dedications",
   preserve the section's title, and preserve in the section all the
   substance and tone of each of the contributor acknowledgements
   and/or dedications given therein.
L. Preserve all the Invariant Sections of the Document,
   unaltered in their text and in their titles.  Section numbers
   or the equivalent are not considered part of the section titles.
M. Delete any section entitled "Endorsements".  Such a section
   may not be included in the Modified Version.
N. Do not retitle any existing section as "Endorsements"
   or to conflict in title with any Invariant Section.

If the Modified Version includes new front-matter sections or
appendices that qualify as Secondary Sections and contain no material
copied from the Document, you may at your option designate some or all
of these sections as invariant.  To do this, add their titles to the
list of Invariant Sections in the Modified Version's license notice.
These titles must be distinct from any other section titles.

You may add a section entitled "Endorsements", provided it contains
nothing but endorsements of your Modified Version by various
parties--for example, statements of peer review or that the text has
been approved by an organization as the authoritative definition of a
standard.

You may add a passage of up to five words as a Front-Cover Text, and a
passage of up to 25 words as a Back-Cover Text, to the end of the list
of Cover Texts in the Modified Version.  Only one passage of
Front-Cover Text and one of Back-Cover Text may be added by (or
through arrangements made by) any one entity.  If the Document already
includes a cover text for the same cover, previously added by you or
by arrangement made by the same entity you are acting on behalf of,
you may not add another; but you may replace the old one, on explicit
permission from the previous publisher that added the old one.

The author(s) and publisher(s) of the Document do not by this License
give permission to use their names for publicity for or to assert or
imply endorsement of any Modified Version.


5. COMBINING DOCUMENTS

You may combine the Document with other documents released under this
License, under the terms defined in section 4 above for modified
versions, provided that you include in the combination all of the
Invariant Sections of all of the original documents, unmodified, and
list them all as Invariant Sections of your combined work in its
license notice.

The combined work need only contain one copy of this License, and
multiple identical Invariant Sections may be replaced with a single
copy.  If there are multiple Invariant Sections with the same name but
different contents, make the title of each such section unique by
adding at the end of it, in parentheses, the name of the original
author or publisher of that section if known, or else a unique number.
Make the same adjustment to the section titles in the list of
Invariant Sections in the license notice of the combined work.

In the combination, you must combine any sections entitled "History"
in the various original documents, forming one section entitled
"History"; likewise combine any sections entitled "Acknowledgements",
and any sections entitled "Dedications".  You must delete all sections
entitled "Endorsements."


6. COLLECTIONS OF DOCUMENTS

You may make a collection consisting of the Document and other documents
released under this License, and replace the individual copies of this
License in the various documents with a single copy that is included in
the collection, provided that you follow the rules of this License for
verbatim copying of each of the documents in all other respects.

You may extract a single document from such a collection, and distribute
it individually under this License, provided you insert a copy of this
License into the extracted document, and follow this License in all
other respects regarding verbatim copying of that document.


7. AGGREGATION WITH INDEPENDENT WORKS

A compilation of the Document or its derivatives with other separate
and independent documents or works, in or on a volume of a storage or
distribution medium, does not as a whole count as a Modified Version
of the Document, provided no compilation copyright is claimed for the
compilation.  Such a compilation is called an "aggregate", and this
License does not apply to the other self-contained works thus compiled
with the Document, on account of their being thus compiled, if they
are not themselves derivative works of the Document.

If the Cover Text requirement of section 3 is applicable to these
copies of the Document, then if the Document is less than one quarter
of the entire aggregate, the Document's Cover Texts may be placed on
covers that surround only the Document within the aggregate.
Otherwise they must appear on covers around the whole aggregate.


8. TRANSLATION

Translation is considered a kind of modification, so you may
distribute translations of the Document under the terms of section 4.
Replacing Invariant Sections with translations requires special
permission from their copyright holders, but you may include
translations of some or all Invariant Sections in addition to the
original versions of these Invariant Sections.  You may include a
translation of this License provided that you also include the
original English version of this License.  In case of a disagreement
between the translation and the original English version of this
License, the original English version will prevail.


9. TERMINATION

You may not copy, modify, sublicense, or distribute the Document except
as expressly provided for under this License.  Any other attempt to
copy, modify, sublicense or distribute the Document is void, and will
automatically terminate your rights under this License.  However,
parties who have received copies, or rights, from you under this
License will not have their licenses terminated so long as such
parties remain in full compliance.


10. FUTURE REVISIONS OF THIS LICENSE

The Free Software Foundation may publish new, revised versions
of the GNU Free Documentation License from time to time.  Such new
versions will be similar in spirit to the present version, but may
differ in detail to address new problems or concerns. See
http:///www.gnu.org/copyleft/.

Each version of the License is given a distinguishing version number.
If the Document specifies that a particular numbered version of this
License "or any later version" applies to it, you have the option of
following the terms and conditions either of that specified version or
of any later version that has been published (not as a draft) by the
Free Software Foundation.  If the Document does not specify a version
number of this License, you may choose any version ever published (not
as a draft) by the Free Software Foundation.


ADDENDUM: How to use this License for your documents

To use this License in a document you have written, include a copy of
the License in the document and put the following copyright and
license notices just after the title page:

      Copyright (c)  YEAR  YOUR NAME.
      Permission is granted to copy, distribute and/or modify this document
      under the terms of the GNU Free Documentation License, Version 1.1
      or any later version published by the Free Software Foundation;
      with the Invariant Sections being LIST THEIR TITLES, with the
      Front-Cover Texts being LIST, and with the Back-Cover Texts being LIST.
      A copy of the license is included in the section entitled "GNU
      Free Documentation License".

If you have no Invariant Sections, write "with no Invariant Sections"
instead of saying which ones are invariant.  If you have no
Front-Cover Texts, write "no Front-Cover Texts" instead of
"Front-Cover Texts being LIST"; likewise for Back-Cover Texts.

If your document contains nontrivial examples of program code, we
recommend releasing these examples in parallel under your choice of
free software license, such as the GNU General Public License,
to permit their use in free software.
A
- About this Document, About this Document
-
- Output formats, About this Document
- Active-DVI, Active-DVI
- AxPoint, AxPoint
B
- beamer, beamer
C
- Combined Slidemaker, Combined Slidemaker
- ConTeXt, ConTeXt
- Contributions, Contributions
- Credits, Credits
D
- deck.js, deck.js
- DFBPoint, DFBPoint
- DocBook
-
- dbslide, DocBook dbslide
- DSSSL, Mandatory
- SGML, General Description
- slides, DocBook slides
E
- elpres, elpres
G
- gpresent, gpresent
H
- HA-prosper, HA-prosper
- HavenPoint, HavenPoint
- Hints, Hints and Tricks
- History, History
- HTML Based, HTML Based Solutions
- hyperref.sty, Mandatory, Mandatory, Optional, Optional
I
- ifmslide, ifmslide
- ImPress, ImPress
- Impress!ve, Impress!ve
- impress.js, impress.js
- Ipe, Ipe
J
- JackSVG, JackSVG
- Java Power Presenter, Java Power Presenter - JPP
K
- KeyJnote, KeyJnote
L
- latex2html, Optional, Optional, Optional
- latex2slides, latex2slides
- Lecturer, Lecturer
- License, Copyright and License
-
- Artistic License, Copyright and License, Copyright and License
- Creative Commons, Copyright and License
- FDL, GNU Free Documentation License
- GPL, Copyright and License, Copyright and License, Copyright and License, Copyright and License, Copyright and License, Copyright and License, Copyright and License, Copyright and License, Copyright and License, Copyright and License, Copyright and License, Copyright and License, Copyright and License, Copyright and License, Copyright and License, Copyright and License, Copyright and License, Copyright and License, Copyright and License, Copyright and License
- LGPL, Copyright and License, Copyright and License, Copyright and License
- LPPL, Copyright and License, Copyright and License, Copyright and License, Copyright and License, Copyright and License, Copyright and License, Copyright and License, Copyright and License, Copyright and License, Copyright and License, Copyright and License, Copyright and License, Copyright and License, Copyright and License, Copyright and License
- LPPL ?, Copyright and License
- MIT, Copyright and License, Copyright and License, Copyright and License
- MPL, Copyright and License
- Public Domain, Copyright and License
- W3C Software Notice And License, Copyright and License
- LyX, LyX
M
- marSLIDE, marSLIDE
- mechapoint, mechapoint
- mozPoint, mozPoint
O
- Orator, Orator
- Other Solutions, Other Solutions
P
- pandoc, pandoc
- PDF, PDF Based Solutions
- PDF Based, PDF Based Solutions
- pdfscreen, pdfscreen
- pdfslide, pdfslide
- pdfTeX, Optional, Optional, Optional
- pdfwin, pdfwin
- People
-
- Adriaens, Hendri, Copyright and License, Additionals, Copyright and License, Credits
- Allen, David M., Copyright and License
- Brauer, Uwe, Credits
- Bruyninckx, Herman, Credits
- Carleos Artime, Carlos Enrique, Credits
- Cazorla León, Ayose, Copyright and License
- Cheong, Otfried, Copyright and License
- Cramer, Florian, Credits
- Dalgleish, Mark, Copyright and License
- Ebner, Michael, Credits
- Effenberger Christian, Copyright and License
- Eijkhout, Victor, Credits
- El Hattab, Hakim, Copyright and License
- Ellison, Christopher, Copyright and License
- Emmel, Thomas, Copyright and License
- Fiedler, J. Martin, Copyright and License
- Fraser, Timothy Jon, Copyright and License
- Golde, Nico, Copyright and License
- Goualard, Frederic, Copyright and License
- Guckes, Sven, Credits
- Hammond, William F., Credits
- Hein, Jochen, Credits
- Heuser, Werner, Credits
- Higinbotham, Scott, Credits
- Hlavacek, Jan, Credits
- Hoenicka, Markus, Copyright and License
- Humbert, Ludger, Credits
- Ingerson, Brian, Copyright and License
- Isambert, Paul, Copyright and License, Credits
- Kiefel, Volker, Copyright and License
- Krennmair, Andreas, Copyright and License
- Kurtinaitis, Andrius, Credits
- Lehmke, Stephan, Copyright and License
- Lenz, Stephane, Credits
- Leske, Sebastian, Credits
- Loeffler, Hannes, Credits
- MacFarlane, John, Copyright and License
- McKendall, Raymond A., Copyright and License
- Meister, Matthias, Copyright and License
- Meyer, Eric A. / Kathryn S., Copyright and License
- Milano, Leo, Copyright and License
- Mundie, David, Credits
- Niepraschk, Rolf, Credits
- Nordhaug, Hans Fredrik, Credits
- Radhakrishnan, C. V., Copyright and License
- Rentzsch, Michael, Copyright and License
- Ronneburg, Frank, Credits
- Sergeant, Matt, Copyright and License
- Stoet, Gijsbert, Copyright and License
- Story, D. P., Copyright and License
- Szopka, Bartek, Copyright and License
- van der Meer, Hans, Copyright and License
- Van Zandt, Timothy, Copyright and License
- Voss, Herbert, Credits
- Wagner, André, Copyright and License
- Walsh, Norman, General Description
- Wiebusch, Martin, Copyright and License
- Pointless, Pointless
- powerdot, powerdot
- PPower4, PPower4 - P^4, PDF Presentation Post Processor
- PPPSlides, PPPSlides
- Present, Present
- Prestimel, Prestimel
- Prosper, Prosper
- pylize, pylize
- Pyslide, Pyslide
R
- rayslides, rayslides
- ReportLab, ReportLab / PythonPoint
- reveal.js, reveal.js
S
- S5, S5
- S5 Reloaded, S5 Reloaded
- screen.sty, screen.sty
- seminar, seminar
- Slide Show Help, HTML Slidy
- Slide40, Slide40
- Slidemaker, Slidemaker
- SlideML, SlideML
- slidenotes, slidenotes
- slides, slides
- slides.sh, slides.sh
- slideshow, slideshow
- Slideshow, Slideshow
- Spork, Spork
T
- talk, talk
- TeX4ht, TeX4ht: LaTeX and TeX for Hypertext
- TeXPower, Mandatory, TeXPower
- Todo, Todo
- TPP, TPP Text Presentation Program
U
- Utopia PDF, Utopia PDF Presentations Bundle
W
- web, web
- wiki2beamer, wiki2beamer
- WML, WML - Website META Language
X
- xdvipresent, xdvipresent
- XSLies, XSLies
- xsw, xsw
- XUL Slideshow Toolkit, XUL Slideshow Toolkit